Best Air Dry Clay Projects for Beginners: 10 Easy DIY Ideas (2026)
This post may contain affiliate links. If you make a purchase through one of my links, I may receive a small commission at no cost to you.
If you've been scrolling through social media admiring all those gorgeous handmade clay creations and thinking "I could never do that," I'm here to tell you that you absolutely can. I've been working with air dry clay for a while now, and honestly, it's one of the most beginner-friendly crafting materials out there. You don't need a fancy kiln, expensive equipment, or even artistic skills to get started.
I remember my first air dry clay project. I was nervous about messing it up, but the beauty of this stuff is that it's so forgiving. If you don't like how something looks, you can just add a little water and reshape it. Plus, it dries right on your kitchen counter, which means you can craft in your apartment, dorm room, or wherever you have a little workspace.

Whether you're looking for a new weekend hobby, want to make thoughtful handmade gifts, or just need something creative to do with your hands while you decompress, I've put together this list of 10 super easy projects that are perfect for absolute beginners. I've included everything you need to know about each project, from what materials to grab to the common mistakes I wish someone had warned me about when I started.
Key Takeaways
Air dry clay requires no kiln or oven and hardens naturally at room temperature in 24 to 72 hours, making it perfect for beginners.
You can find air dry clay and supplies at local stores like Michaels, Walmart, and Target, or order online from Amazon with starter kits costing as little as $5 to $12.
The 10 easiest beginner projects include trinket dishes, ring holders, coasters, stamped bowls, incense holders, plant markers, magnets, napkin rings, ornaments, and leaf imprint dishes.
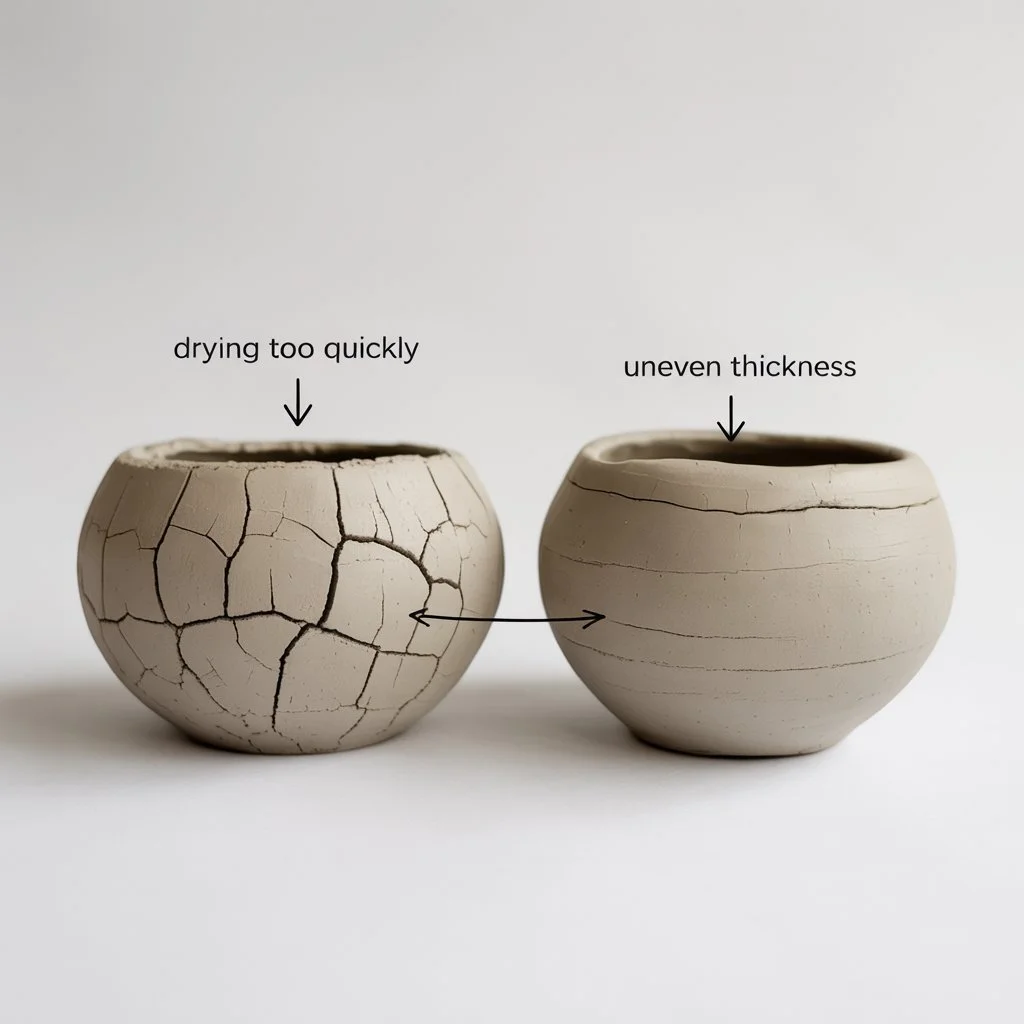
Common mistakes to avoid include making pieces too thick (causes cracking), drying too quickly with heat (causes warping), and forgetting to seal finished projects (reduces durability).
Most projects use the same basic materials including air dry clay, a rolling pin, water for smoothing, acrylic paint, and a clear sealant, so one supply haul can get you started on multiple projects.
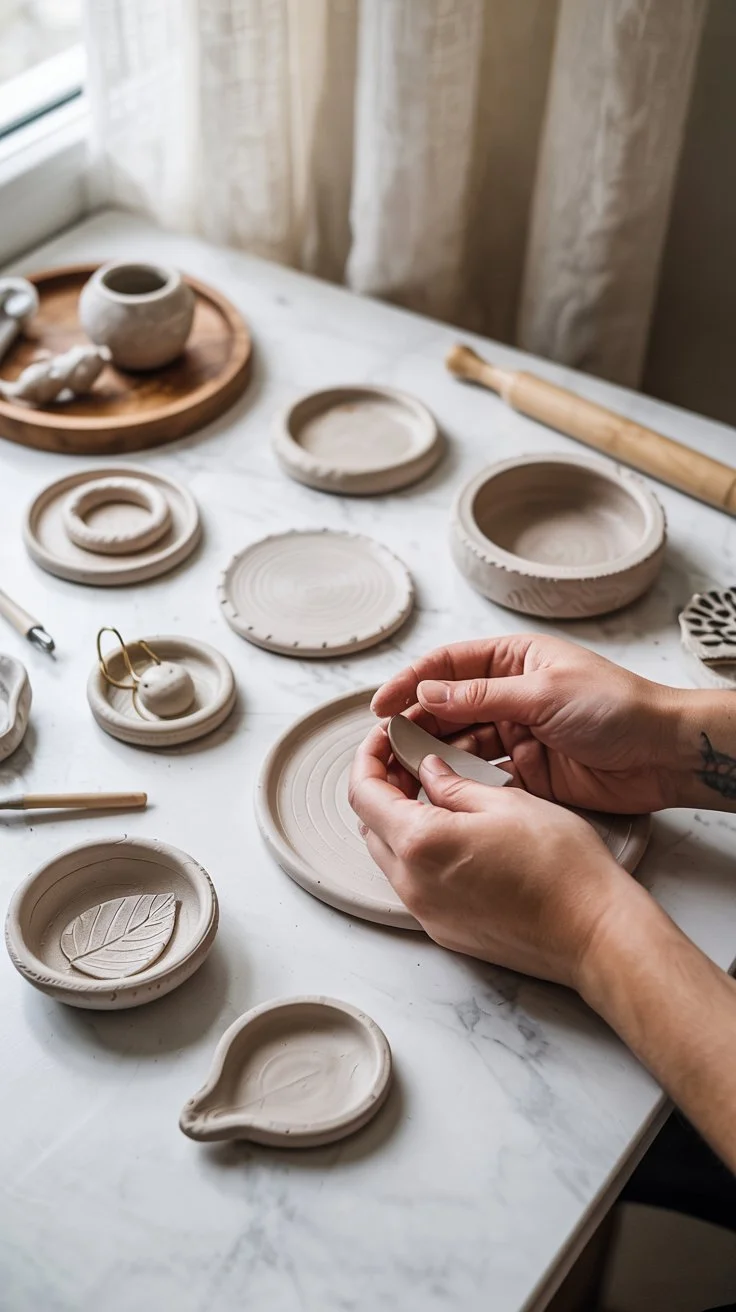
1. Easy Air Dry Clay Trinket Dishes and Jewelry Trays for Beginners
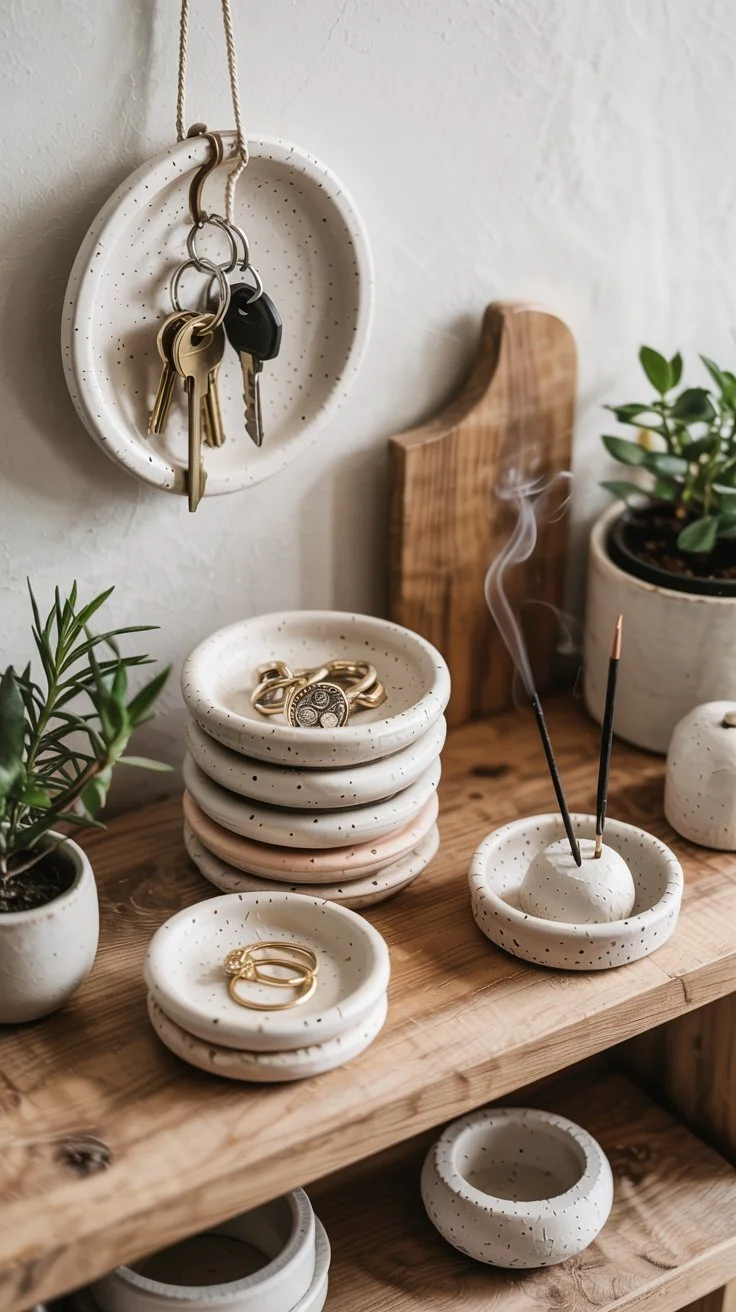
Trinket dishes are the perfect starting project for absolute beginners. These small decorative bowls are used to hold jewelry, keys, coins, or other small items on your dresser or entryway table.
Why It's Easy:
This project requires minimal shaping skills since you'll use an existing bowl as a mold. You simply roll out the clay, drape it over the bowl, and let gravity do most of the work. There's no complex sculpting or precise measurements needed.
Materials Needed:
Air dry clay (white or terracotta)
Rolling pin or smooth bottle
Small bowl to use as a mold
Parchment paper or plastic wrap
Acrylic paint (optional)
Sealant or mod podge
Things to Watch Out For:
Make sure to line your mold bowl with plastic wrap or parchment paper, otherwise your clay will stick to it. Roll your clay to an even thickness of about 1/4 inch so it dries uniformly without cracking. Don't make the dish too thick or it will take days to dry and may crack in the center.
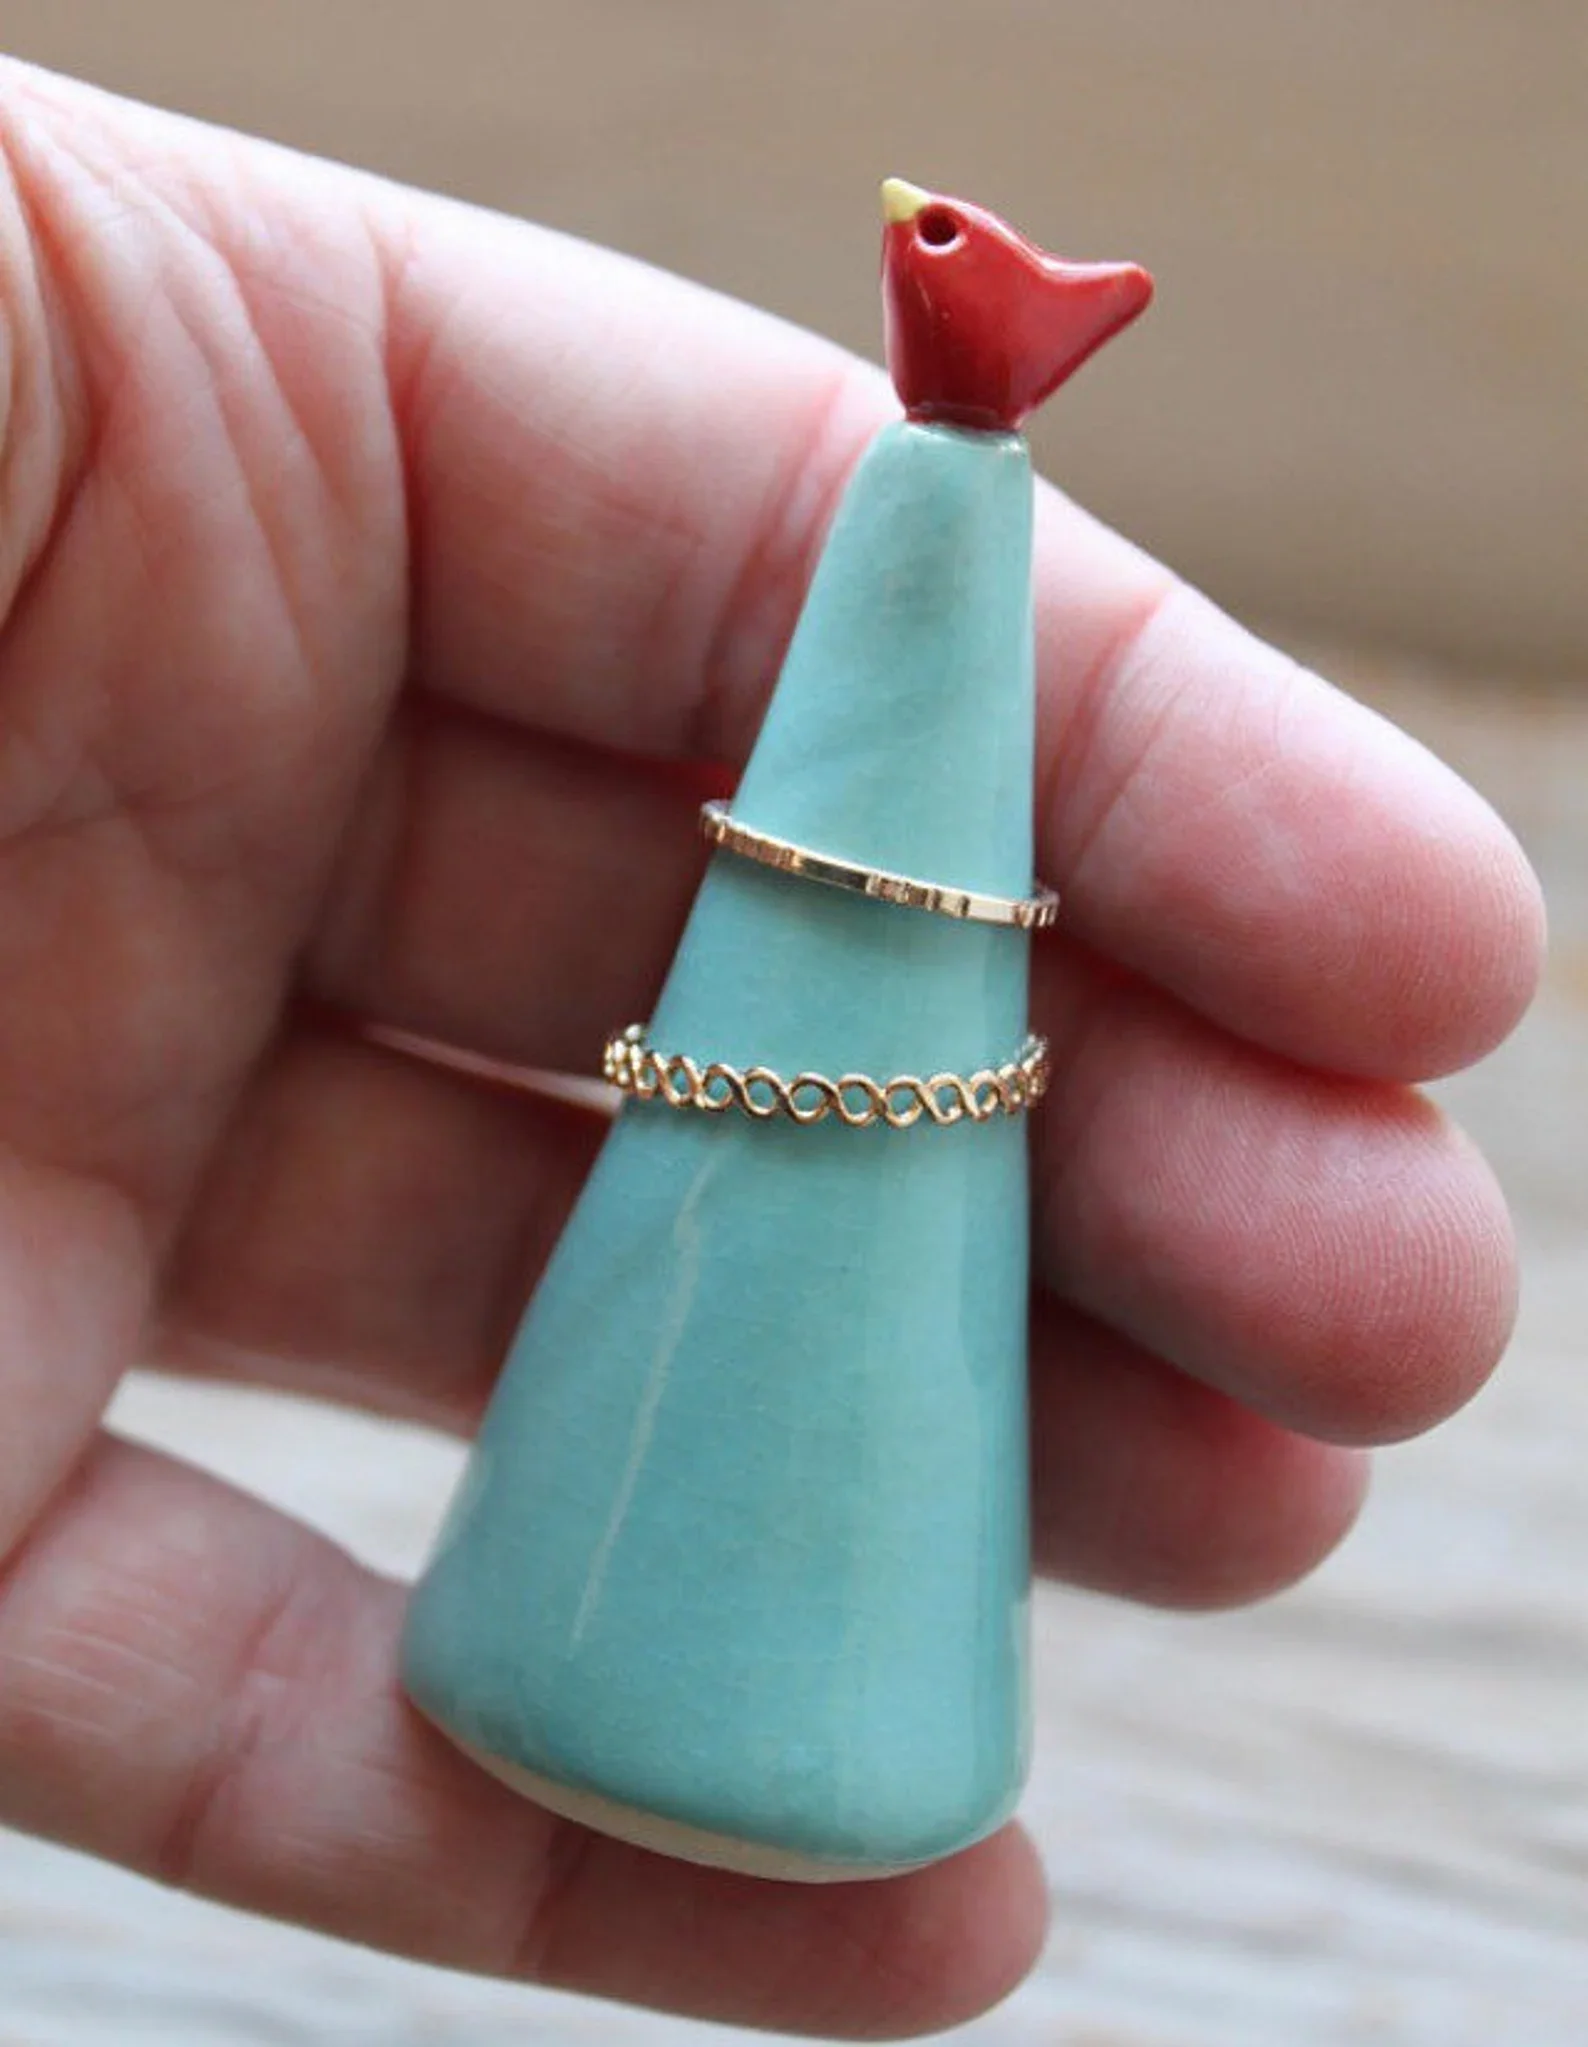
2. Simple Air Dry Clay Ring Holders Tutorial
Ring holders are small sculptural pieces designed to store rings when you're not wearing them. They typically feature a cone shape, finger-like protrusion, or decorative stand where rings can slide on.
Why It's Easy:
The basic cone shape is one of the simplest forms to create with clay. You can make it as simple or decorative as you like, and mistakes often add character to the final piece. This project teaches you basic hand-building techniques without requiring symmetry or precision.
Materials Needed:
Air dry clay
Smooth work surface
Water and sponge for smoothing
Sandpaper (fine grit)
Acrylic paint and brushes
Clear sealant
Things to Watch Out For:
Create a wide, stable base so your ring holder doesn't tip over when you place rings on it. The cone or finger shape should be smooth and thick enough that it won't break easily. Let it dry completely before painting, as wet clay will absorb paint unevenly and may become soggy.
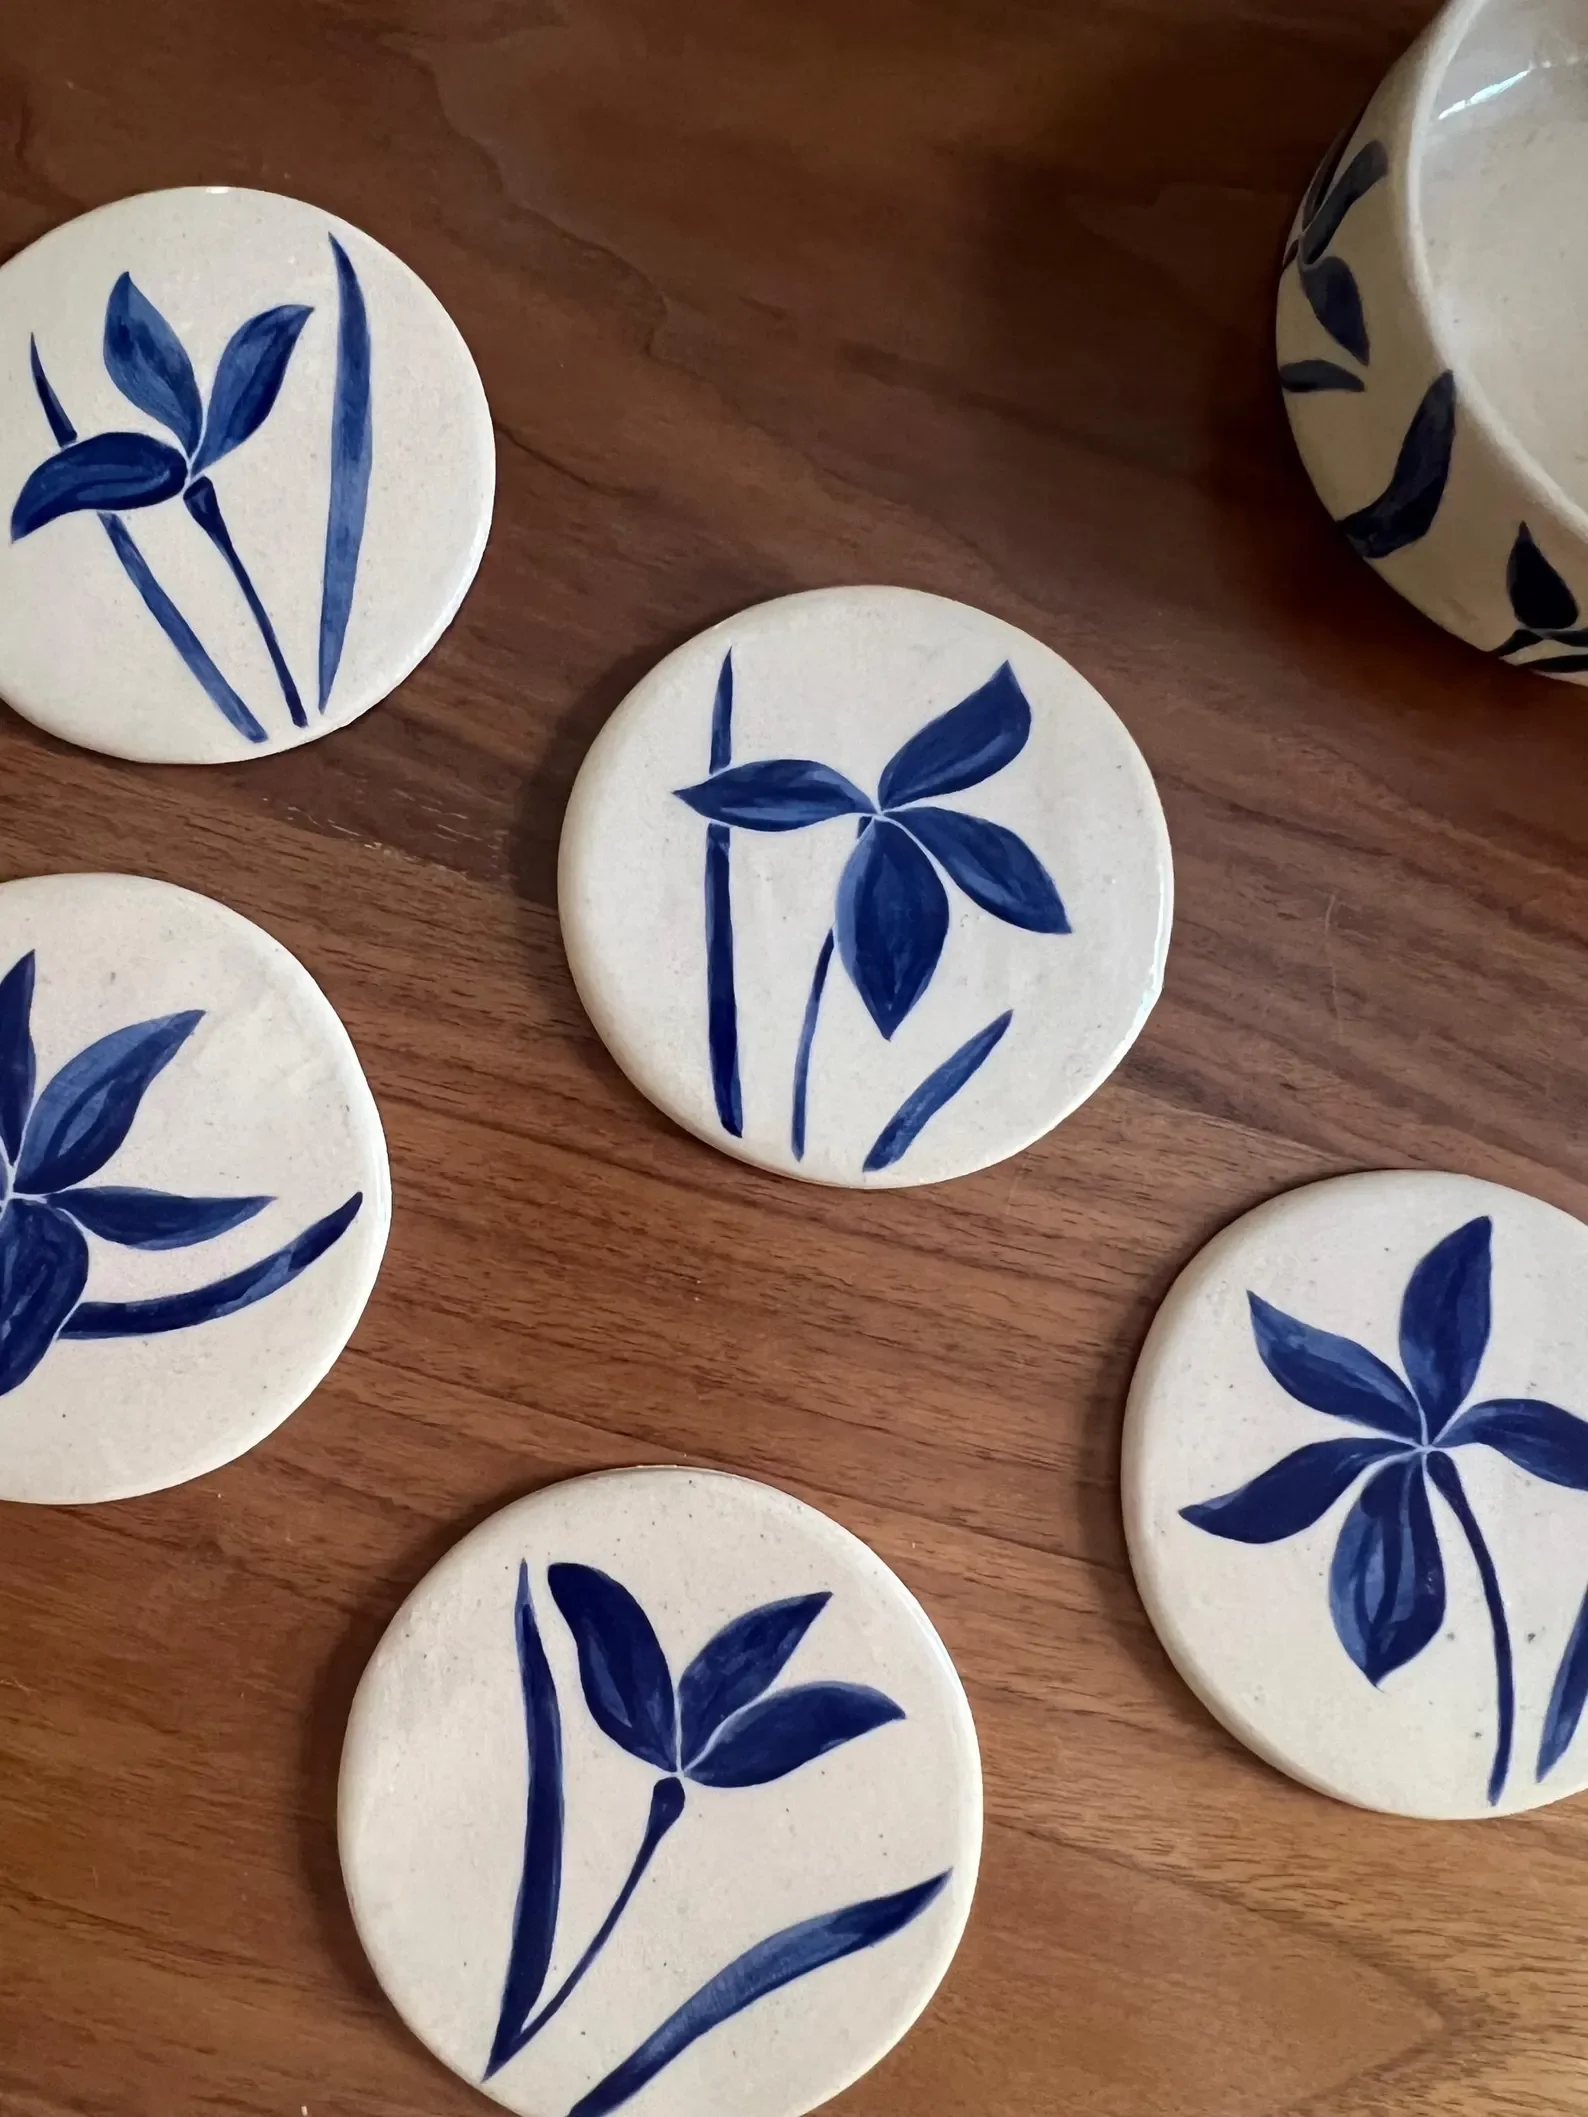
3. DIY Air Dry Clay Coasters for Beginners
Clay coasters are practical home accessories that protect your furniture from drink rings while adding a handmade touch to your decor. They're flat, easy to make, and perfect for experimenting with textures and patterns.
Why It's Easy:
Coasters are essentially flat circles or squares, which means you don't need to worry about three-dimensional shaping. You can use cookie cutters for perfect shapes every time, and the flat surface is ideal for practicing stamping and texture techniques.
Materials Needed:
Air dry clay
Rolling pin
Cookie cutters (round or square, 3-4 inches)
Texture tools (stamps, lace, leaves, or burlap)
Cork or felt backing
Waterproof sealant
Sandpaper
Things to Watch Out For:
Roll your clay to a consistent thickness of about 1/4 to 3/8 inch. Thinner coasters may crack, while thicker ones take forever to dry. Make sure to seal your coasters with a waterproof finish, otherwise condensation from cold drinks will damage them. Sand the edges smooth after drying to prevent them from scratching your table.
4. How to Make Stamped Air Dry Clay Bowls
Stamped clay bowls combine the simplicity of bowl-making with decorative patterns created by pressing rubber stamps, lace, or natural materials into the clay surface before shaping.
Why It's Easy:
The stamping technique is very forgiving and adds professional-looking detail without requiring artistic skills. You create the pattern on flat clay first, then shape it into a bowl, so you can see exactly how your design looks before committing to the final form.
Materials Needed:
Air dry clay
Rolling pin
Rubber stamps, lace doilies, or textured fabric
Small bowl for molding
Plastic wrap
Acrylic paint (optional)
Sealant
Things to Watch Out For:
Press your stamps firmly and evenly into the clay to get a clear impression, but don't press so hard that you make the clay too thin. Stamp the clay while it's flat and before shaping it into a bowl. If you try to stamp after shaping, you'll distort the bowl. Choose bowls with gentle curves rather than sharp angles for easier molding.
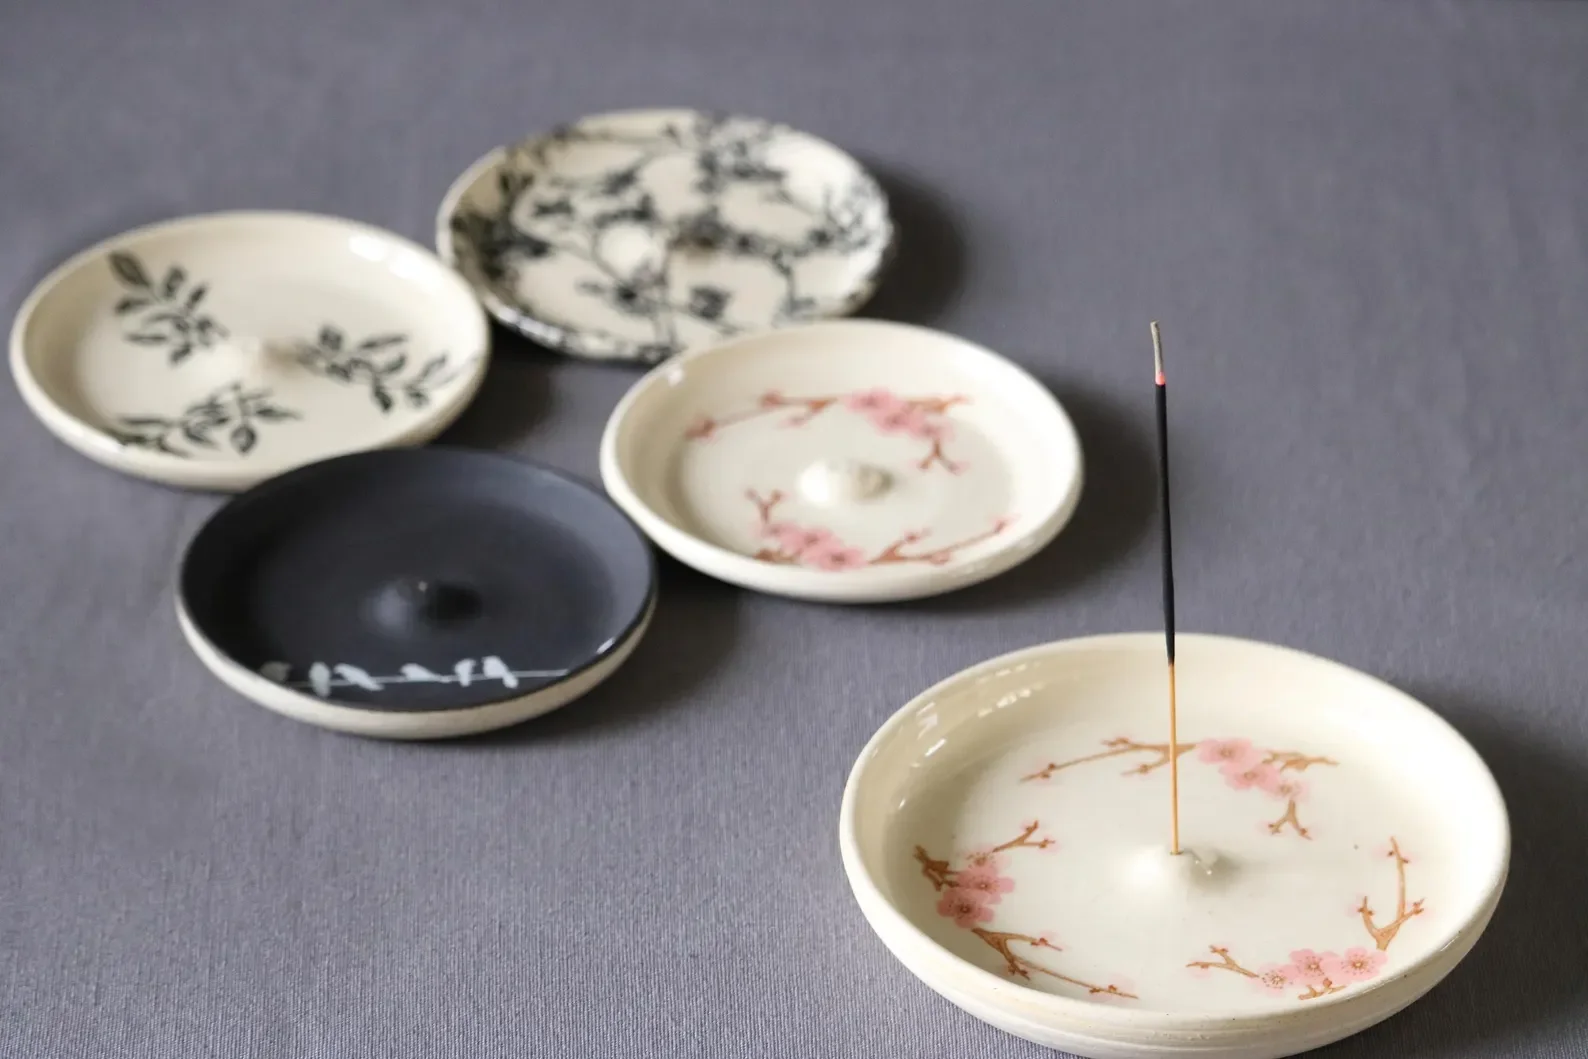
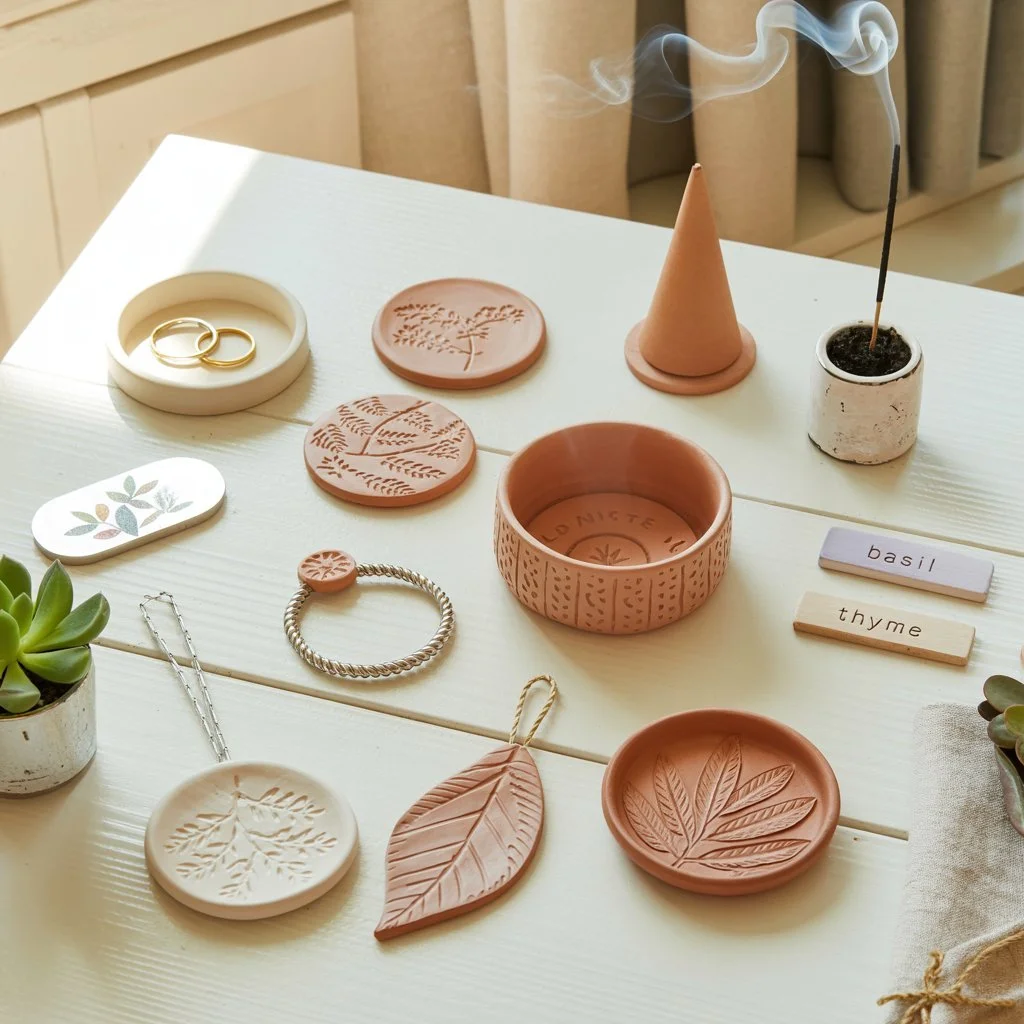
5. Air Dry Clay Incense Holders DIY Project
Incense holders are small functional pieces with a hole or groove designed to hold incense sticks while they burn, catching the ash in a decorative base.
Why It's Easy:
Most incense holders are simple flat shapes like moons, leaves, or rectangles with just one small hole. There's no complex structure, and the design is so minimalist that even imperfect edges look intentionally rustic.
Materials Needed:
Air dry clay
Rolling pin
Cookie cutters or knife
Toothpick or skewer (for making the incense hole)
Sandpaper
Acrylic paint
Sealant
Things to Watch Out For:
Make the hole for the incense stick while the clay is still wet using a toothpick or skewer. The hole should be slightly larger than your incense sticks to account for clay shrinkage during drying. Create a small channel or indented line from the hole to the edge where ash can fall. Test the holder with an incense stick before painting to ensure it stands upright properly.
6. Air Dry Clay Plant Markers and Garden Stakes
Plant markers are tags used to label herbs, vegetables, or flowers in your garden. They typically feature a flat surface for writing plant names and a pointed end or hole for placing in soil or hanging.
Why It's Easy:
These are flat, simple shapes that require no molding or complex techniques. You can make dozens at once by rolling out a sheet of clay and cutting multiple markers. The rustic, handmade look is actually desirable for garden projects, so perfection isn't necessary.
Materials Needed:
Air dry clay
Rolling pin
Knife or cookie cutters
Toothpick or pencil for writing
Acrylic paint or permanent markers
Waterproof outdoor sealant
Wooden skewers or wire (if making stakes)
Things to Watch Out For:
Write or stamp the plant names while the clay is still slightly damp but not wet. If you wait until it's fully dry, you'll have to use paint or markers instead. Use multiple coats of outdoor waterproof sealant since these will be exposed to rain and sun. If you're inserting wooden stakes, do it while the clay is wet, or create a deep hole for adding the stake later with strong glue.
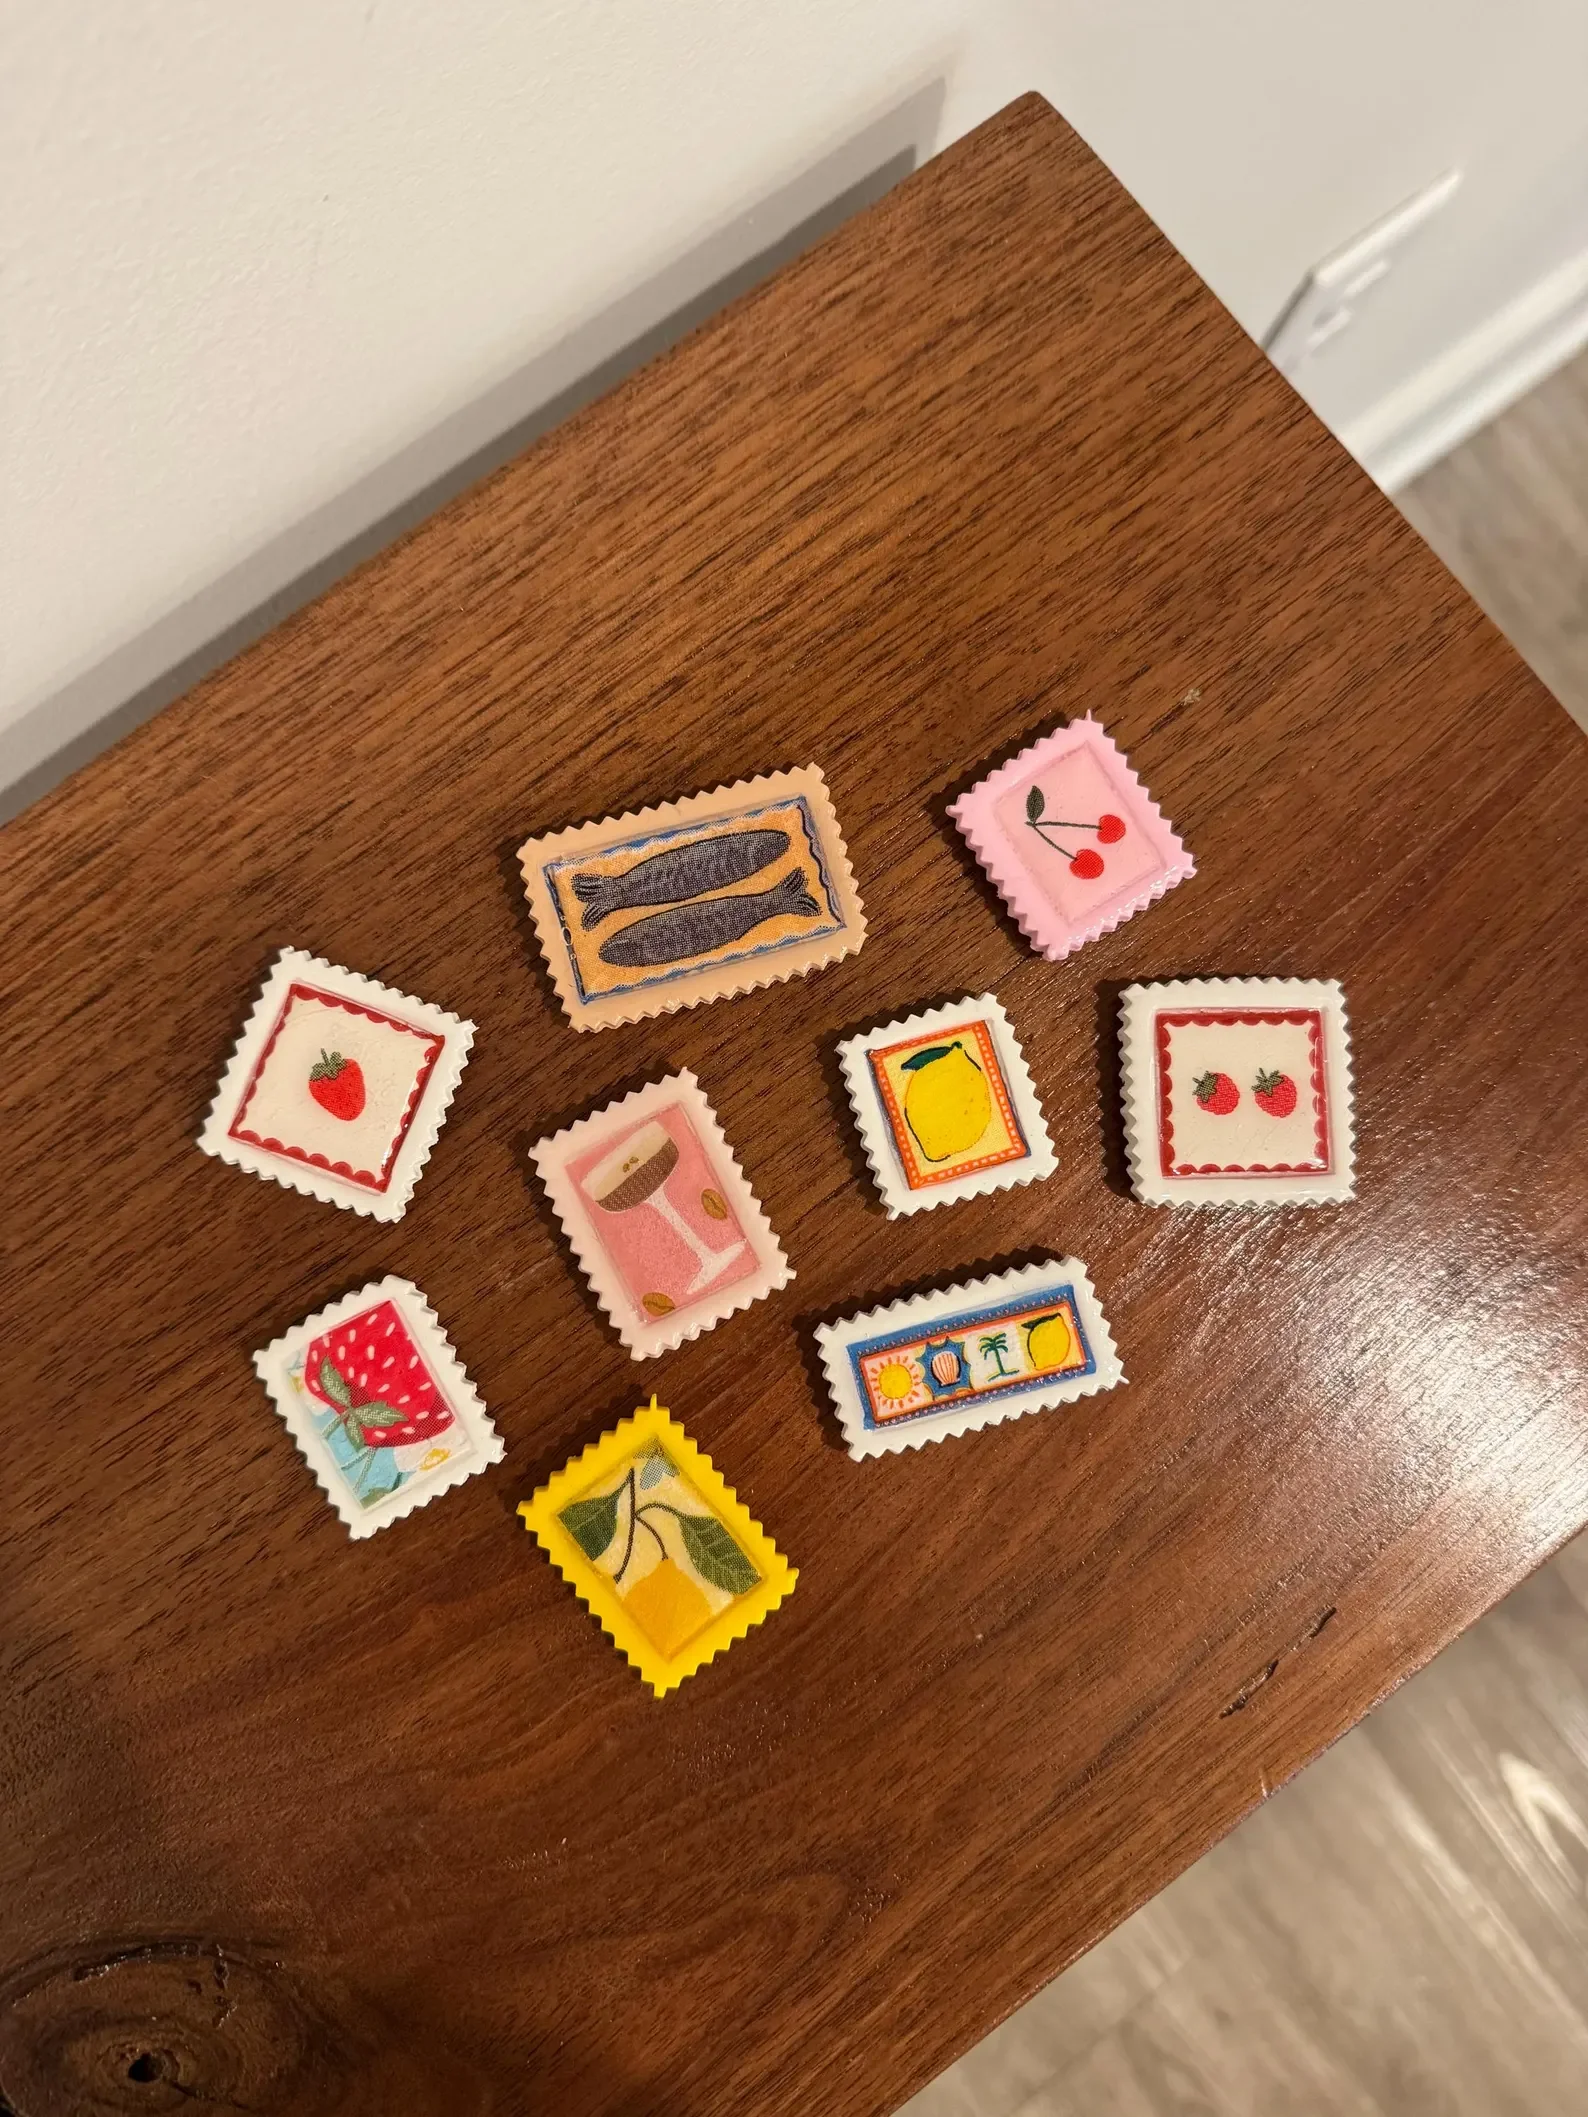
7. Easy Air Dry Clay Magnets for Kids and Adults
Clay magnets are small decorative pieces attached to magnetic backing that can be used on refrigerators, magnetic boards, or filing cabinets. They can be any shape you like, from simple geometric designs to flowers, animals, or food shapes.
Why It's Easy:
Magnets are tiny, which means they dry quickly and use very little clay. You can experiment with different shapes and techniques without committing much time or material. The small size also means mistakes are easily hidden or quickly remade.
Materials Needed:
Air dry clay
Rolling pin
Small cookie cutters or sculpting tools
Sandpaper
Acrylic paint
Clear sealant
Small circular magnets
Strong craft glue (like E6000)
Things to Watch Out For:
Keep your magnets relatively flat and thin so they're not too heavy for the magnetic backing. Thick, chunky magnets won't stick well to vertical surfaces. Let the clay dry completely and seal it before attaching magnets. Use strong glue specifically designed for multiple surfaces, as regular white glue won't hold magnets securely.
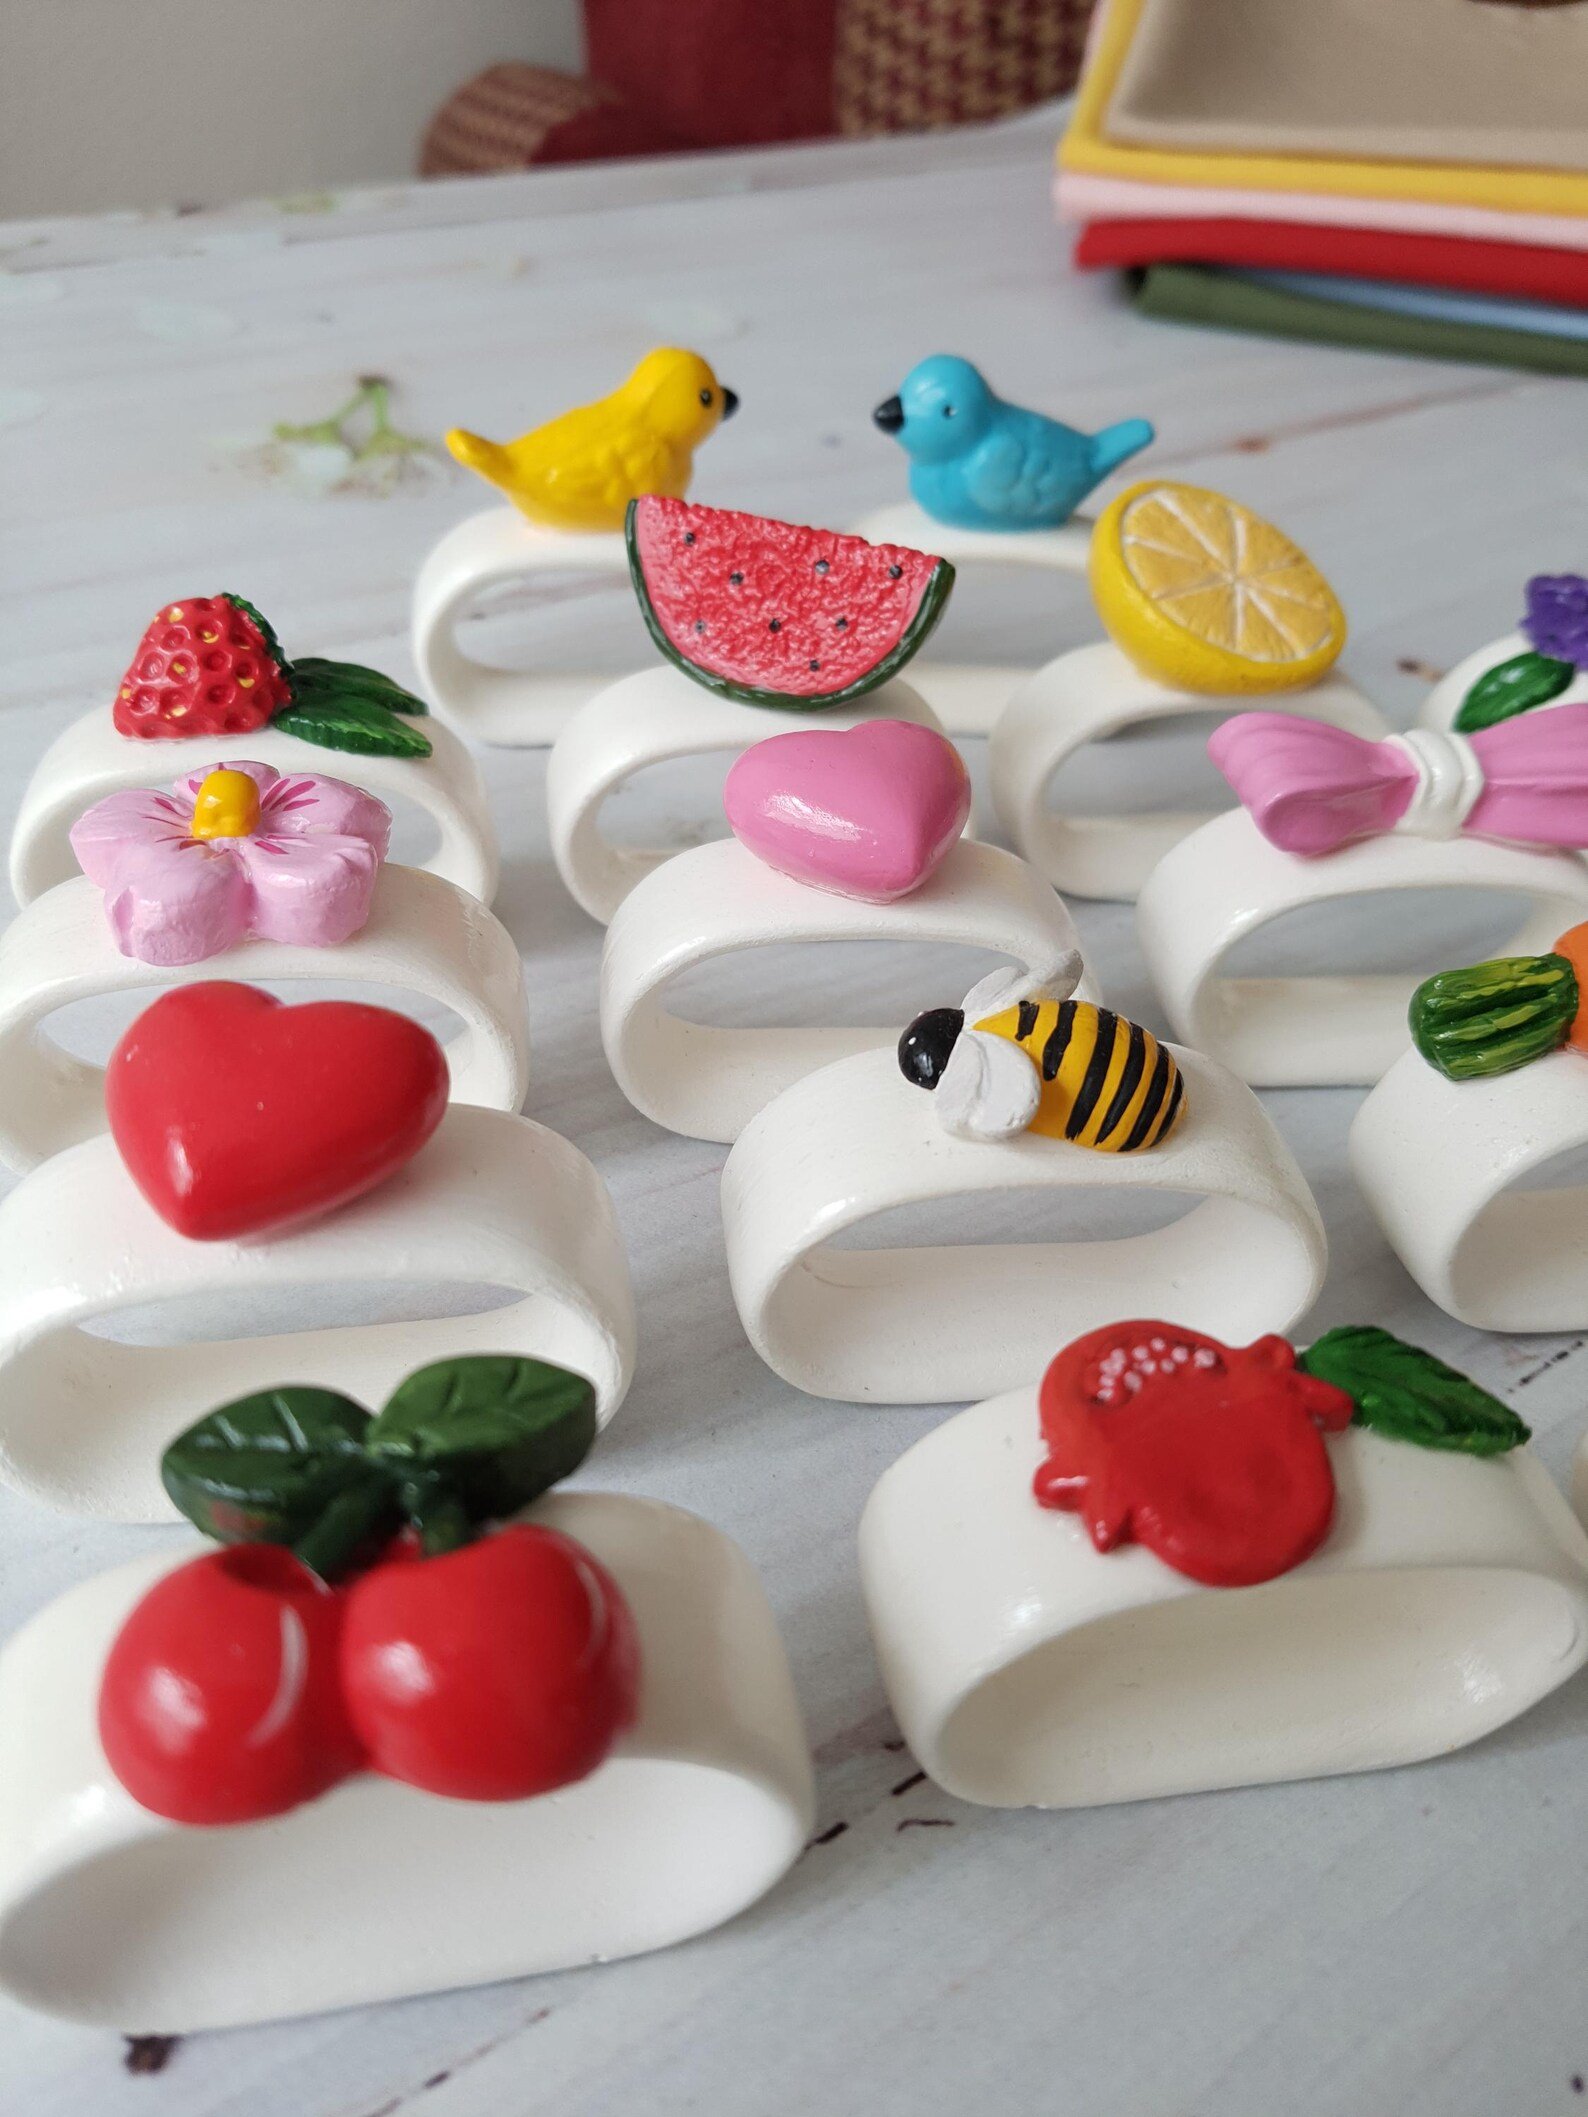
8. Handmade Air Dry Clay Napkin Rings
Napkin rings are decorative bands that hold rolled napkins for table settings. They're simple tube shapes that can be left plain or decorated with textures, cutouts, or paint.
Why It's Easy:
The basic technique is just rolling clay into a snake shape and connecting the ends to form a circle. There's no need for molds or complex shaping. You can make a set of matching napkin rings in less than an hour.
Materials Needed:
Air dry clay
Smooth work surface
Water and sponge
Small cup or bottle (as a sizing guide)
Texture tools or cookie cutters for decoration
Acrylic paint
Sealant
Things to Watch Out For:
Roll the clay snake to an even thickness so your napkin ring doesn't look lumpy. Use a small cup or bottle as a guide to make sure all your napkin rings are the same size. Smooth the seam where the ends connect using water and your finger. The opening should be about 1.5 to 2 inches in diameter to fit folded napkins comfortably.
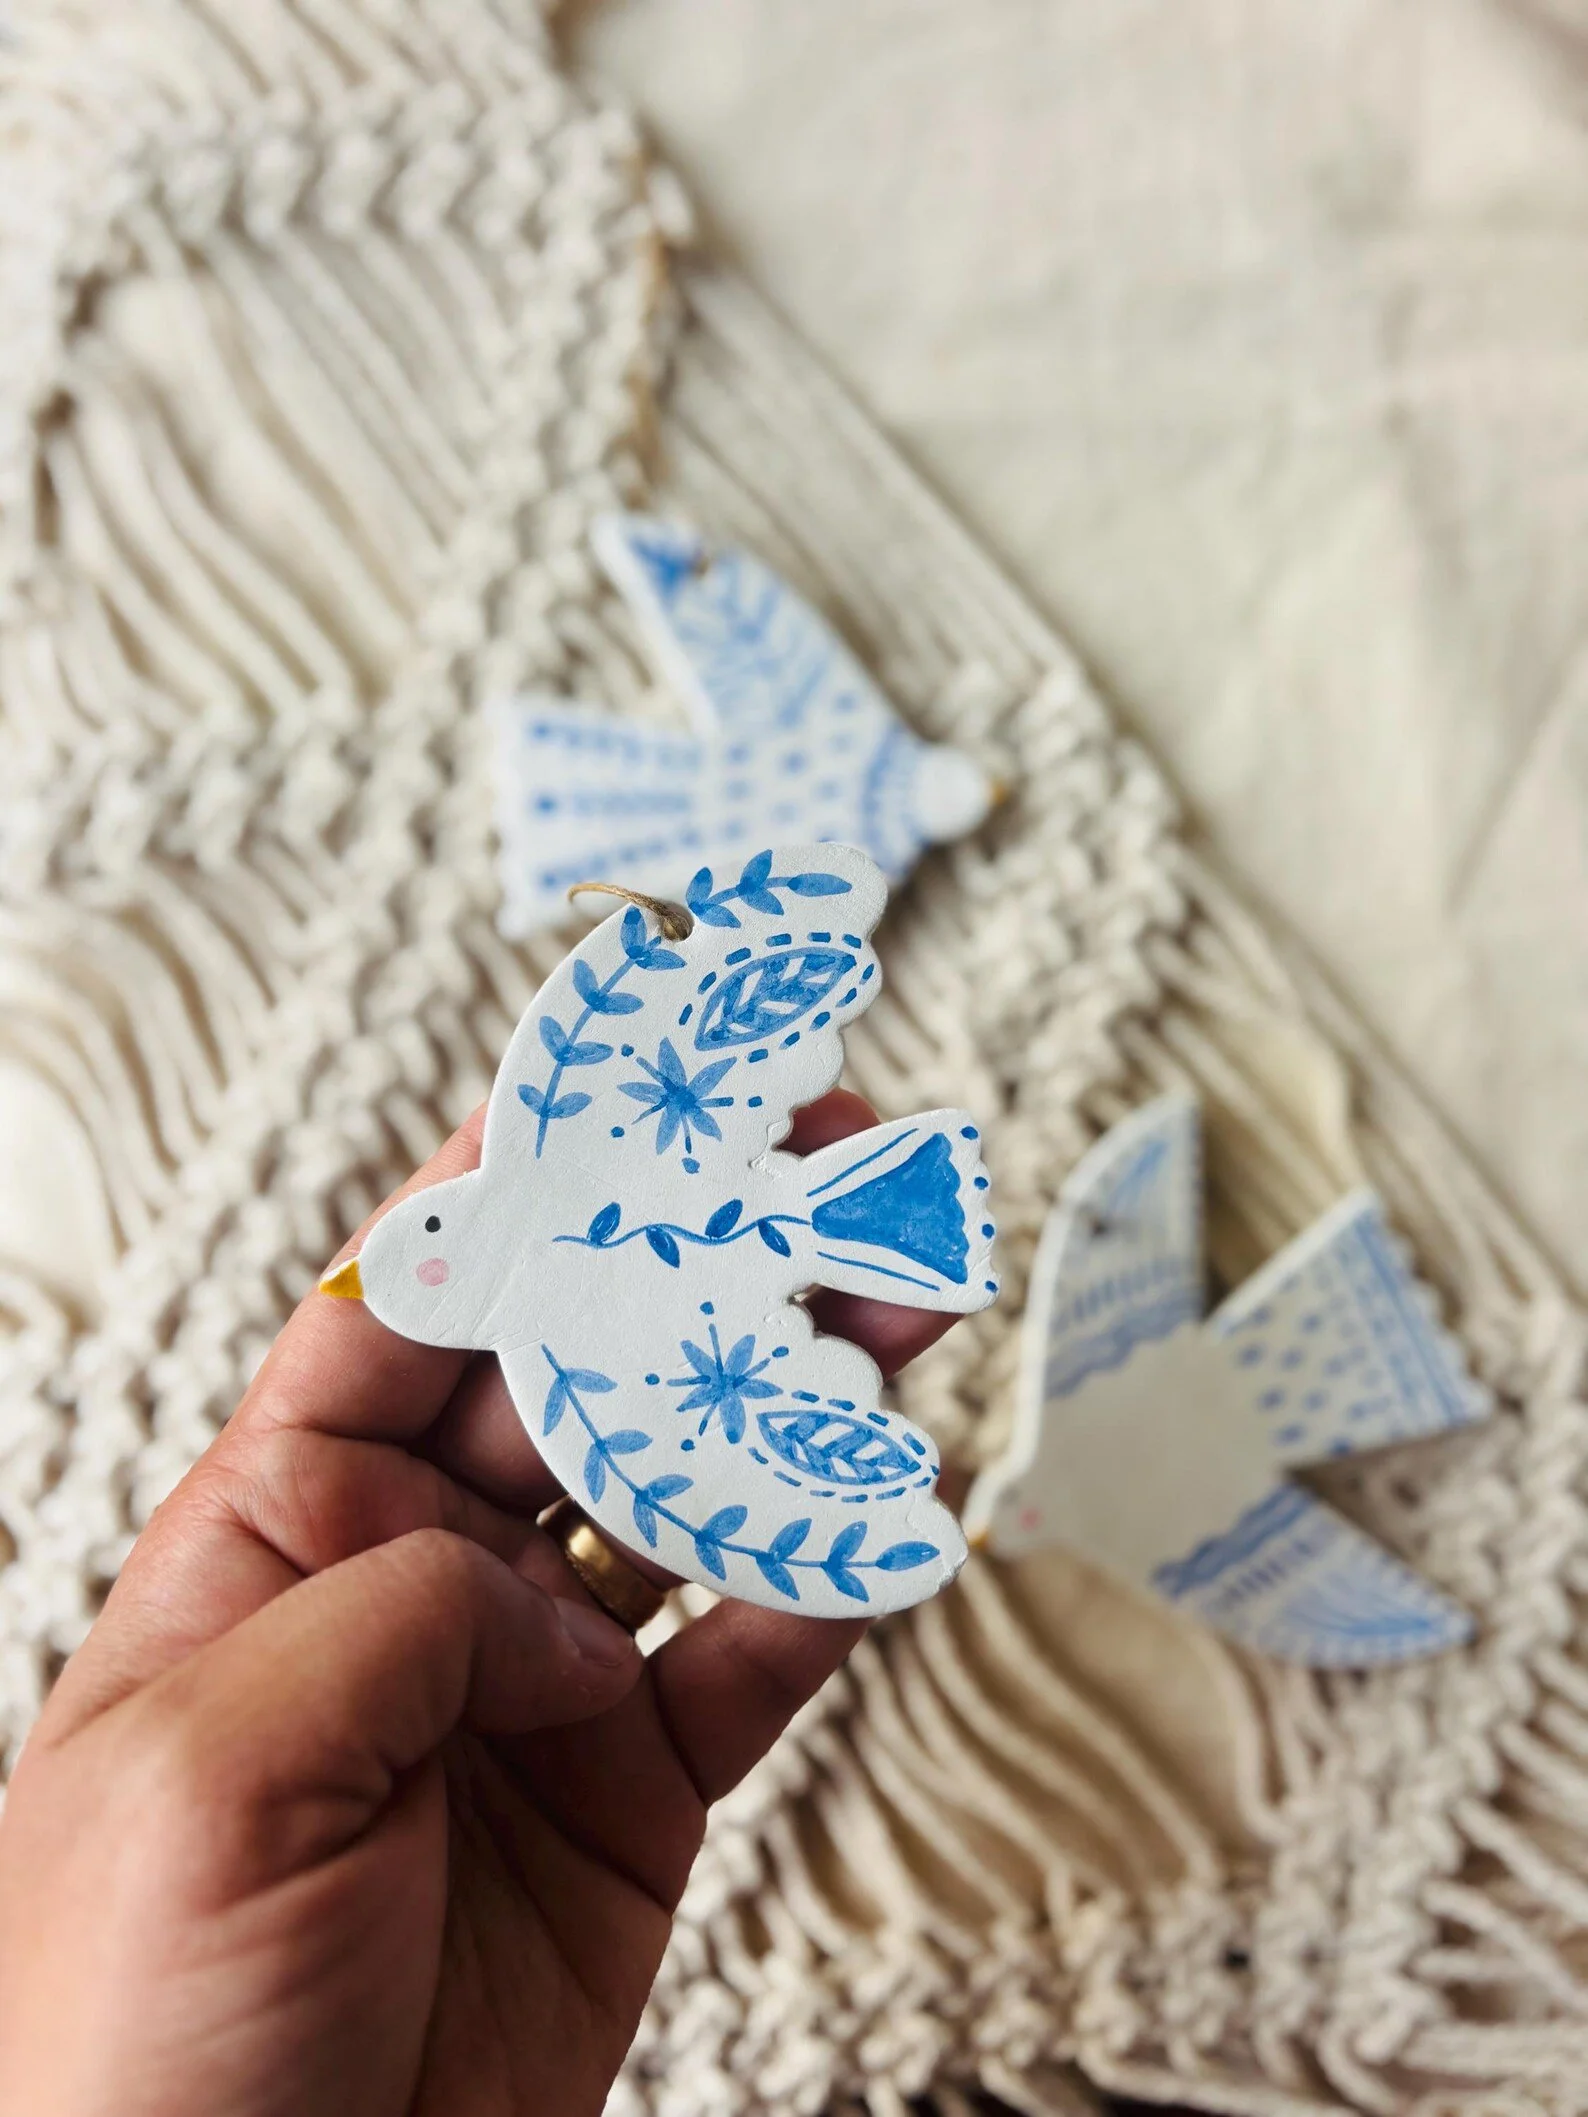
9. Air Dry Clay Ornament Decorations Tutorial
Clay ornaments are decorative hangings for holidays, seasonal decor, or year-round wall art. They can be any shape from traditional circles to stars, hearts, or custom cutouts.
Why It's Easy:
Ornaments are flat shapes that dry quickly and don't require structural integrity since they just hang decoratively. You can use cookie cutters for consistent shapes or hand-cut unique designs. The lightweight nature means they won't break easily when hanging.
Materials Needed:
Air dry clay
Rolling pin
Cookie cutters
Straw or toothpick (for making hanging holes)
Sandpaper
Acrylic paint
Ribbon or twine for hanging
Sealant
Things to Watch Out For:
Make the hanging hole while the clay is wet, and make it larger than you think necessary because clay shrinks as it dries. Place the hole at least 1/4 inch from the edge to prevent tearing. Dry ornaments flat rather than hanging them, otherwise they'll warp. Don't make ornaments too thick or they'll be heavy and may break the ribbon.
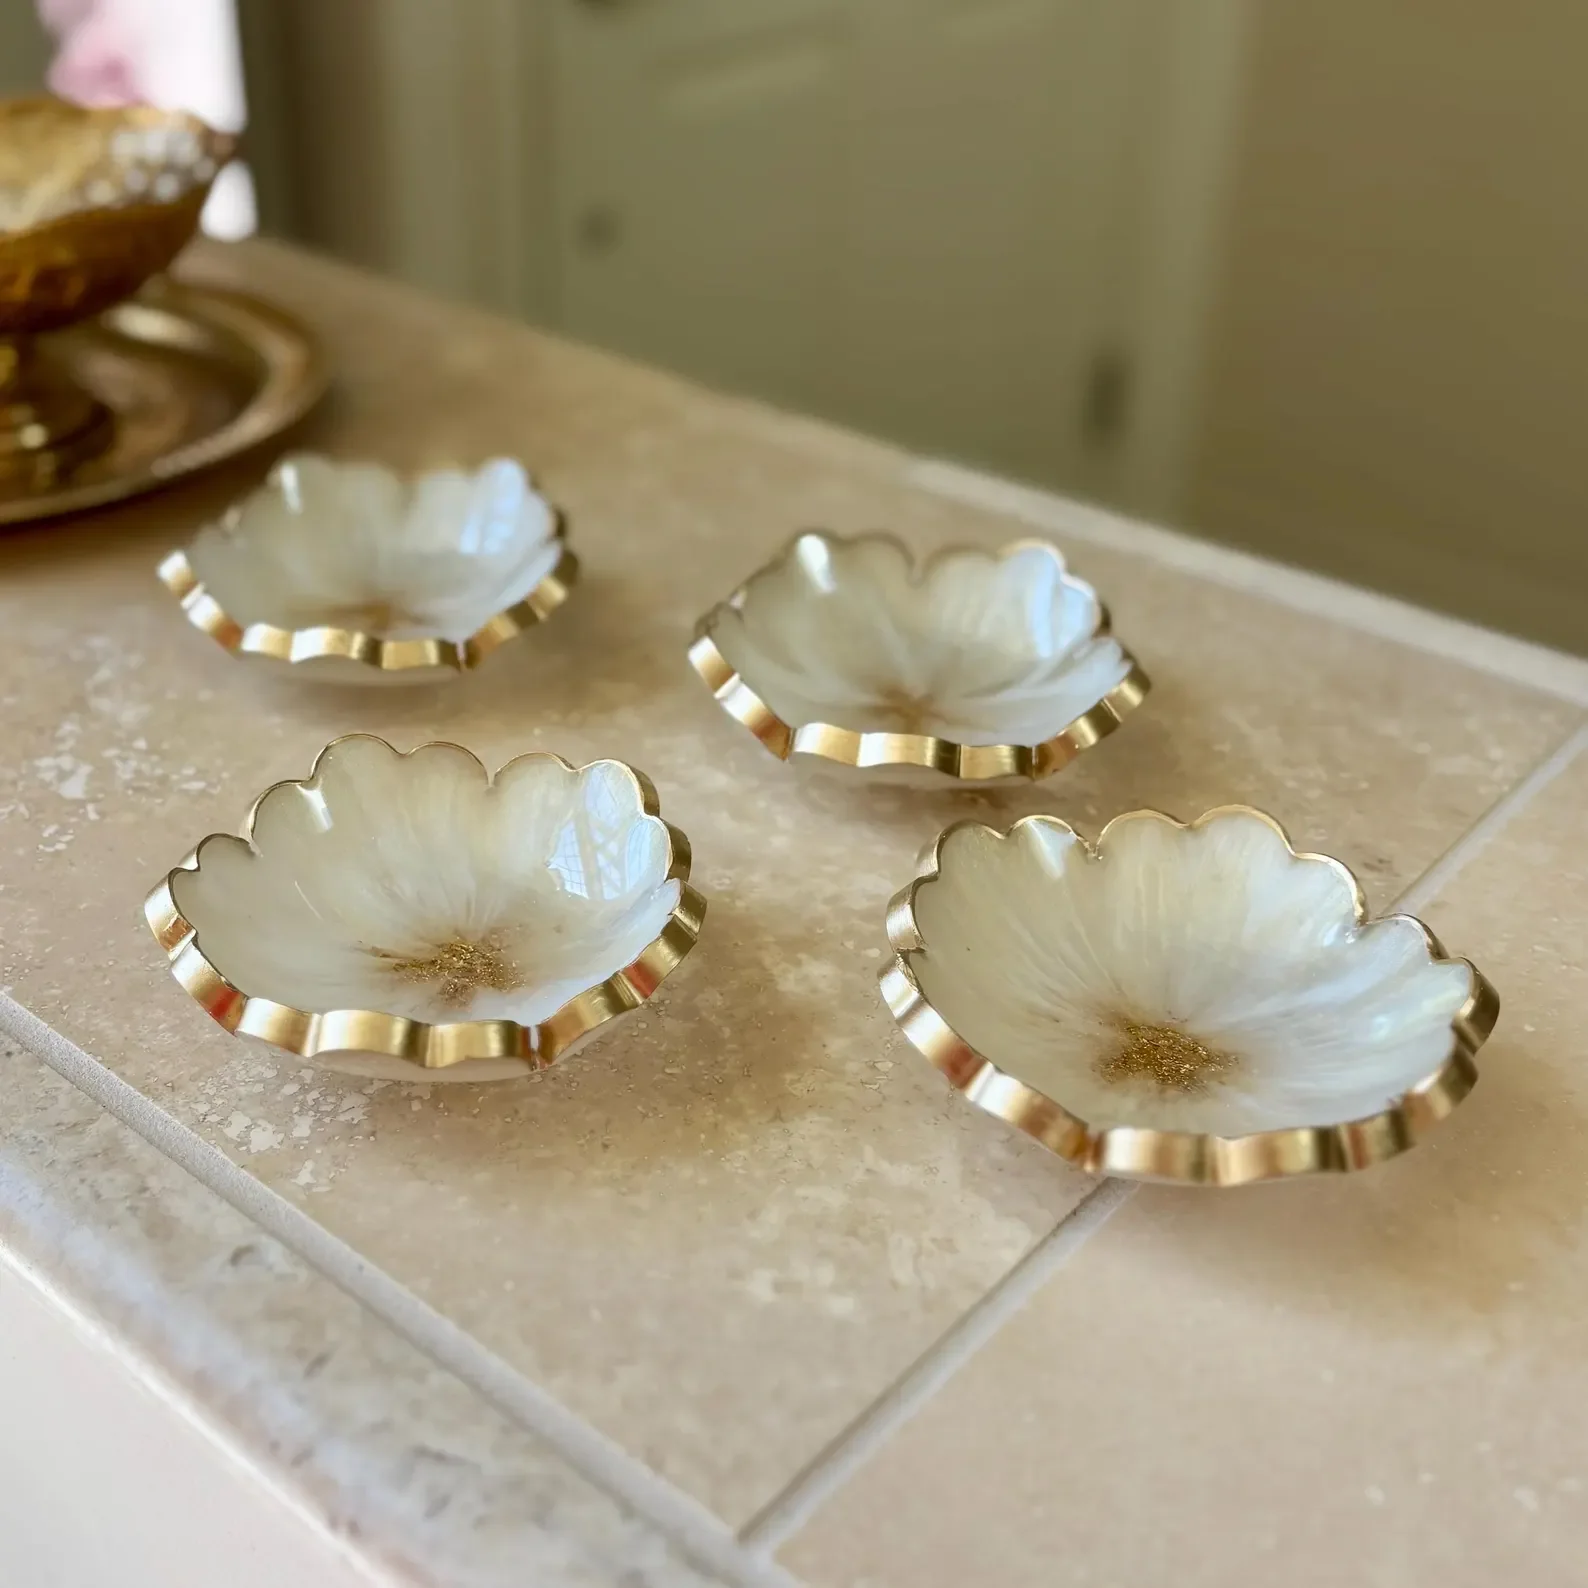
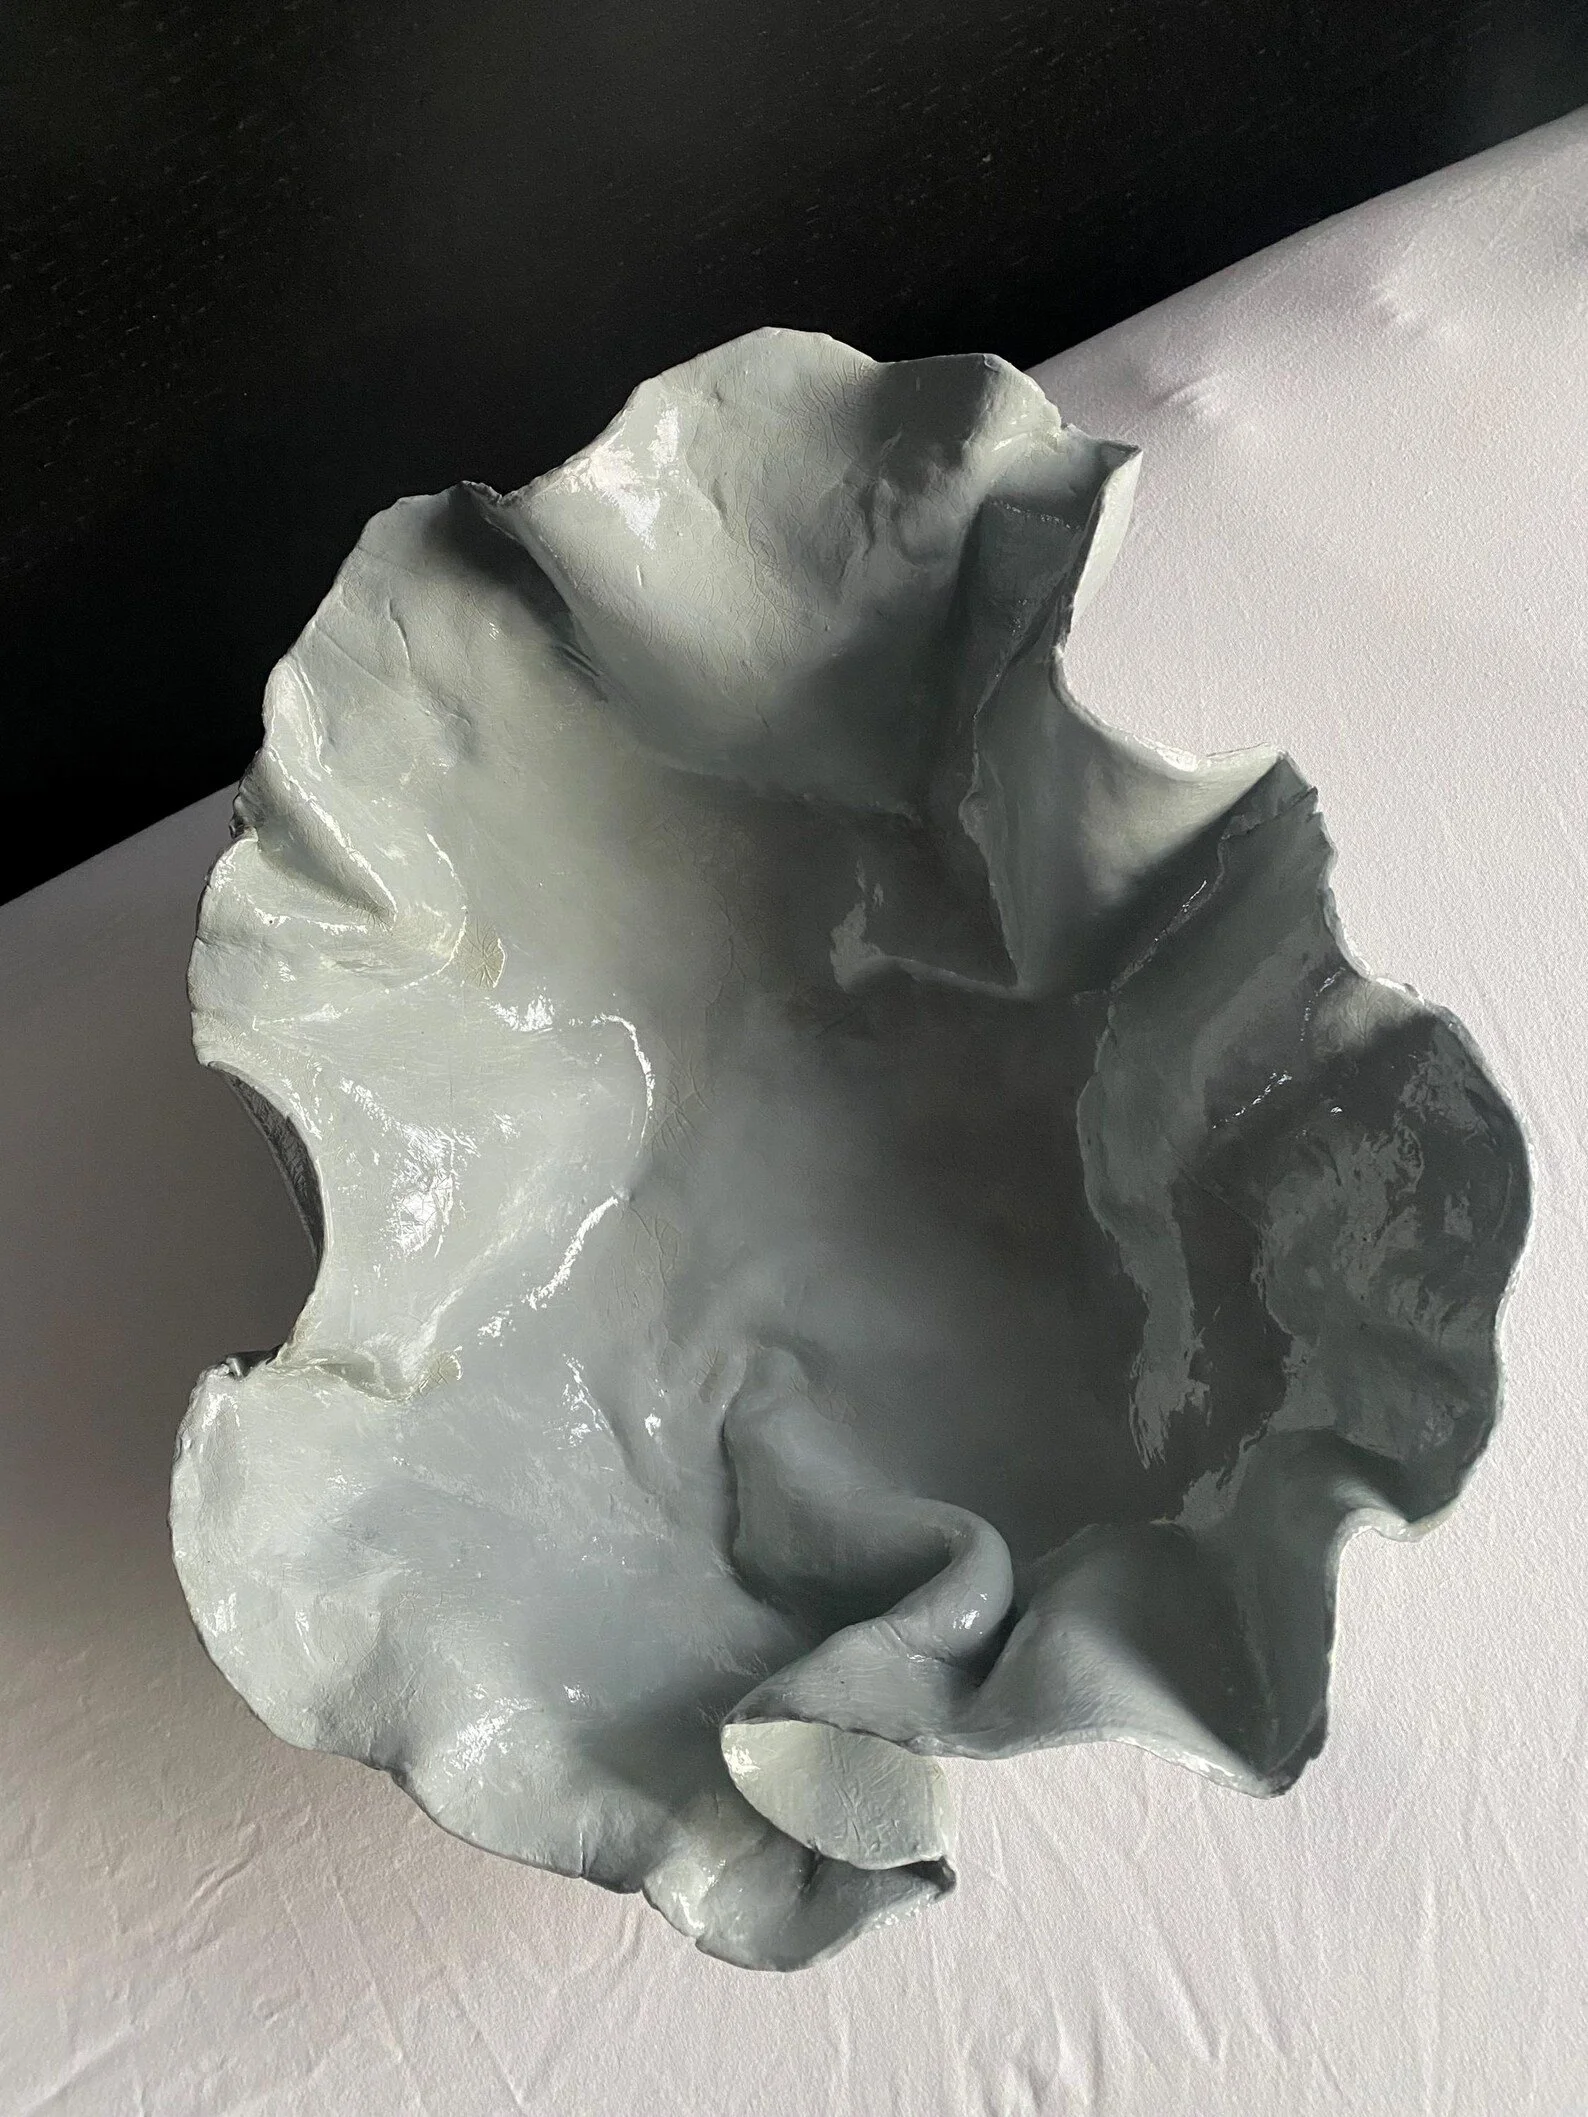
10. Beautiful Leaf Imprint Air Dry Clay Dishes
Leaf imprint dishes feature beautiful natural patterns created by pressing real leaves into clay, leaving behind detailed vein textures that create organic, nature-inspired pieces.
Why It's Easy:
Nature does the decorating for you. Simply press a leaf firmly into rolled clay and the texture transfers beautifully. No artistic skill required. The natural patterns look professional and elegant every time.

Materials Needed:
Air dry clay
Rolling pin
Fresh leaves with prominent veins (rose, oak, maple work well)
Small bowl for molding
Plastic wrap
Acrylic paint (optional)
Sealant
Things to Watch Out For:
Use fresh leaves rather than dried ones for the clearest impressions. Press the vein side of the leaf into the clay for the most detail. Roll over the leaf with your rolling pin or press firmly with your hands to capture all the fine details. Remove the leaf carefully by peeling from one edge rather than lifting straight up. Some leaves may stick, so you can leave bits behind for added texture or gently scrub them off after the clay dries.
Where to Buy Air Dry Clay and Supplies Online and In Stores
Finding air dry clay and crafting supplies is easy, with options available both online and in local stores.
Local Retailers:
Michaels and Hobby Lobby carry multiple brands of air dry clay including Crayola and DAS
Walmart has basic air dry clay in the craft section at budget-friendly prices
Target stocks air dry clay kits and individual packages
Local art supply stores often have professional-grade options
Online Options:
Amazon offers the widest selection including bulk packages and variety packs
Blick Art Materials has professional-grade clays and sculpting tools
Etsy features handmade clay tools and specialty items
Dick Blick and Jerry's Artarama for serious crafters
Popular Brands to Look For:
Crayola Air Dry Clay (great for beginners, very affordable)
DAS Air Hardening Clay (smooth texture, available in white and terracotta)
Activa Plus Air Dry Clay (professional quality, minimal cracking)
Jovi Air Dry Modeling Clay (especially good for detailed work)
Estimated Costs:
Basic 2.5 lb package of air dry clay costs between $5-$12
Sculpting tool sets range from $8-$20
Acrylic paint sets start around $10-$15
Sealers and finishes cost approximately $5-$15 per bottle
Essential Tips for Working with Air Dry Clay for Beginners
Storage: Keep unused clay in an airtight container or sealed plastic bag with a damp paper towel to prevent it from drying out. Properly stored clay can last for months.
Drying Time: Most air dry clay takes 24-72 hours to dry completely depending on thickness. Thin pieces under 1/4 inch may dry in 24 hours, while thick sculptures can take up to a week.
Preventing Cracks: Work on a non-stick surface like parchment paper. Keep clay at an even thickness throughout your project. Dry pieces slowly away from direct heat or sunlight. If cracks appear, fill them with a paste made from clay dust and water.
Smoothing Techniques: Keep a small bowl of water and a sponge nearby to smooth surfaces and edges. Use your finger dipped in water to blend seams. Sand dried pieces gently with fine-grit sandpaper for a polished finish.
Painting and Finishing: Always let clay dry completely before painting. Use acrylic paints for best results. Apply 2-3 thin coats rather than one thick coat. Seal finished pieces with mod podge, acrylic sealer, or clear varnish to protect them from moisture and wear.
Getting Started with Air Dry Clay
So there you have it! Ten super approachable air dry clay projects that won't leave you frustrated or wondering why you even tried. I genuinely believe that working with air dry clay is one of the best ways to dip your toes into the world of pottery and sculpture without the intimidation factor of expensive classes or equipment.
What I love most about these projects is that they're actually useful. You're not just making stuff to collect dust on a shelf. You're creating trinket dishes that'll hold your jewelry, coasters that'll protect your coffee table, and plant markers that'll make your garden look adorable. Plus, there's something really satisfying about using something you made with your own hands every single day.
My advice? Start simple. Grab a package of air dry clay from your local craft store (seriously, it's like $8), pick one project that speaks to you, and just go for it. Maybe it'll be a trinket dish or some coasters. Don't overthink it or wait for the perfect time or worry about making mistakes. The clay is super forgiving, and honestly, those little imperfections are what make handmade stuff special anyway.
As you work through these beginner projects, you'll start to get a feel for how the clay behaves, how wet is too wet, how thick is too thick, and which techniques work best for you. Before you know it, you'll be eyeing more complex projects and sharing your creations with friends who'll be amazed that you made them yourself.
Remember, every single person who's amazing at pottery started exactly where you are right now, staring at a lump of clay and wondering what to do with it. The only difference between you and them is that they started. So clear off a spot on your kitchen table, put on some music or your favorite podcast, and let yourself enjoy the process of making something beautiful. You've got this!
Super Easy No-Sew DIY Nautical Pillow Covers
Frequently Asked Questions Easy Air Dry Clay Projects
What is air dry clay and how is it different from regular clay?
Air dry clay is a modeling material that hardens naturally when exposed to air at room temperature, requiring no kiln, oven, or special equipment. Regular clay (also called ceramic or pottery clay) must be fired in a kiln at extremely high temperatures to become permanent and waterproof. Air dry clay is more convenient for beginners and home crafters, though it's not as durable or waterproof as fired clay. It's perfect for decorative items but not ideal for functional dishware or items that will be exposed to constant moisture.
How long does air dry clay take to dry completely?
Most air dry clay pieces take 24 to 72 hours to dry completely, depending on thickness and humidity levels. Thin pieces like coasters or ornaments may dry in 24 hours, while thicker bowls or sculptural pieces can take 3-5 days. Very thick projects may need up to a week. You can tell clay is fully dry when it's completely hard, cool to the touch (wet clay feels slightly cool), and has changed to a lighter color. For best results, dry pieces at room temperature away from direct heat sources or sunlight.
Can I speed up the drying process for air dry clay?
While it's tempting to speed up drying, this often causes cracking and warping. However, you can help clay dry more evenly by placing it in a well-ventilated area with good air circulation. Some crafters use a fan on low speed positioned away from the piece. Avoid using ovens, hair dryers, or direct sunlight as the rapid temperature change causes the outside to dry much faster than the inside, resulting in cracks. Patience leads to better results with air dry clay.
Why does my air dry clay keep cracking?
Air dry clay cracks for several common reasons. Uneven thickness causes some areas to dry faster than others, creating tension. Drying too quickly from heat or sun exposure makes the outside harden while the inside is still wet. Clay that's too dry when you're working with it lacks flexibility. Thick projects naturally crack as water evaporates from the center. To prevent cracks, maintain even thickness throughout your project, dry pieces slowly at room temperature, keep clay properly hydrated while working, and avoid making pieces thicker than one inch.
Do I need to seal air dry clay projects?
Sealing is highly recommended for most air dry clay projects, though not strictly necessary for purely decorative items kept in dry conditions. Sealing protects your pieces from moisture, makes them easier to clean, and prevents painted surfaces from chipping. For functional items like coasters, trinket dishes, or anything that might encounter water, sealing is essential. Use acrylic sealer, mod podge, or clear varnish applied in 2-3 thin coats. For outdoor items like plant markers, use outdoor-rated waterproof sealant.
Can air dry clay get wet after it dries?
Unsealed air dry clay should not get wet after drying because it will absorb water and become soft again, potentially dissolving or losing its shape. Once sealed properly with a waterproof finish, air dry clay can handle light moisture like condensation from a cold drink on a coaster. However, even sealed air dry clay is not fully waterproof like fired ceramic and should not be submerged in water or used for drinking vessels. For items that will be frequently wet, consider using polymer clay or traditional fired pottery instead.
What type of paint works best on air dry clay?
Acrylic paint works best on air dry clay because it adheres well, dries quickly, and comes in endless colors. Apply paint only after the clay is completely dry. For best coverage, start with a white base coat if your clay is terracotta colored. Use multiple thin coats rather than one thick coat to prevent cracking. Watercolor paints can also be used for a softer look, while poster paints work but may need more sealing. Always seal painted clay with a clear finish to protect the paint from chipping and wear.
How do I store leftover air dry clay?
Store unused air dry clay in an airtight plastic bag or container with all air pressed out. Wrap the clay tightly in plastic wrap first, then place it in a zip-top bag or sealed container. Add a slightly damp (not wet) paper towel to the container to maintain moisture. Store in a cool, dry place away from direct sunlight. Check stored clay periodically and add moisture if it starts to dry out. Properly stored clay can last for several months. If clay becomes too dry, you can sometimes revive it by kneading in small amounts of water.
Is air dry clay safe for kids?
Most air dry clay brands are non-toxic and safe for children, but always check the packaging for age recommendations and safety certifications. Brands like Crayola specifically market their air dry clay as child-safe. Supervise young children to ensure they don't put clay in their mouths. Teach kids to wash their hands after crafting. Some air dry clays may contain preservatives or additives that can cause skin irritation in sensitive individuals, so watch for reactions. Air dry clay is generally safer than polymer clay, which requires baking and can release fumes.
Can I make my own air dry clay at home?
Yes, you can make homemade air dry clay using simple ingredients like baking soda, cornstarch, and water, or flour, salt, and water. These homemade versions work well for simple projects but have different properties than commercial air dry clay. They tend to be less smooth, may crack more easily, and don't hold fine details as well. However, they're extremely budget-friendly and safe for kids. Commercial air dry clay offers more consistent results, better workability, and stronger finished pieces, making it worth the investment for serious projects.