How to Add Authentic Character to Your Beach Cottage with Vintage Decor
This post may contain affiliate links. If you make a purchase through one of my links, I may receive a small commission at no cost to you.
Whether you're decorating an actual seaside property or just want to bring some coastal charm inland, vintage touches are the fastest way to create that authentic, lived-in coastal vibe that makes a house feel like a real home.
In this guide, I'm sharing my five favorite ways to style your beach cottage with authentic vintage pieces. We're talking weathered window frames, sea-worn collections, vintage textiles, time-honored kitchen finds, and coastal lighting that sets the perfect mood.
Ready to give your home that cozy, collected-over-time character? Let's dive into the vintage touches that'll transform your space into the beach cottage of your dreams.
Key Takeaways
Old windows are pure magic: I love using weathered window frames and salvaged glass pieces. They add instant coastal character and work as both wall art and photo displays.
How you display things matters: Vintage cloches and antique boxes turn simple beach finds into something special. Think curated collections that look like they belong in a museum.
Layer your textiles like crazy: I'm talking sun-faded quilts, grain sack pillows, and old linens all mixed together. This is what gives you that effortless, collected-over-time look.
Don't skip the kitchen: Vintage enamelware, weathered cutting boards, and old mason jars make your kitchen feel warm and welcoming. It's where the magic happens.
Lighting sets the whole mood: Nautical fixtures, vintage hurricane lamps, and DIY mason jar lights create that cozy atmosphere we all love. It's the finishing touch that pulls everything together.
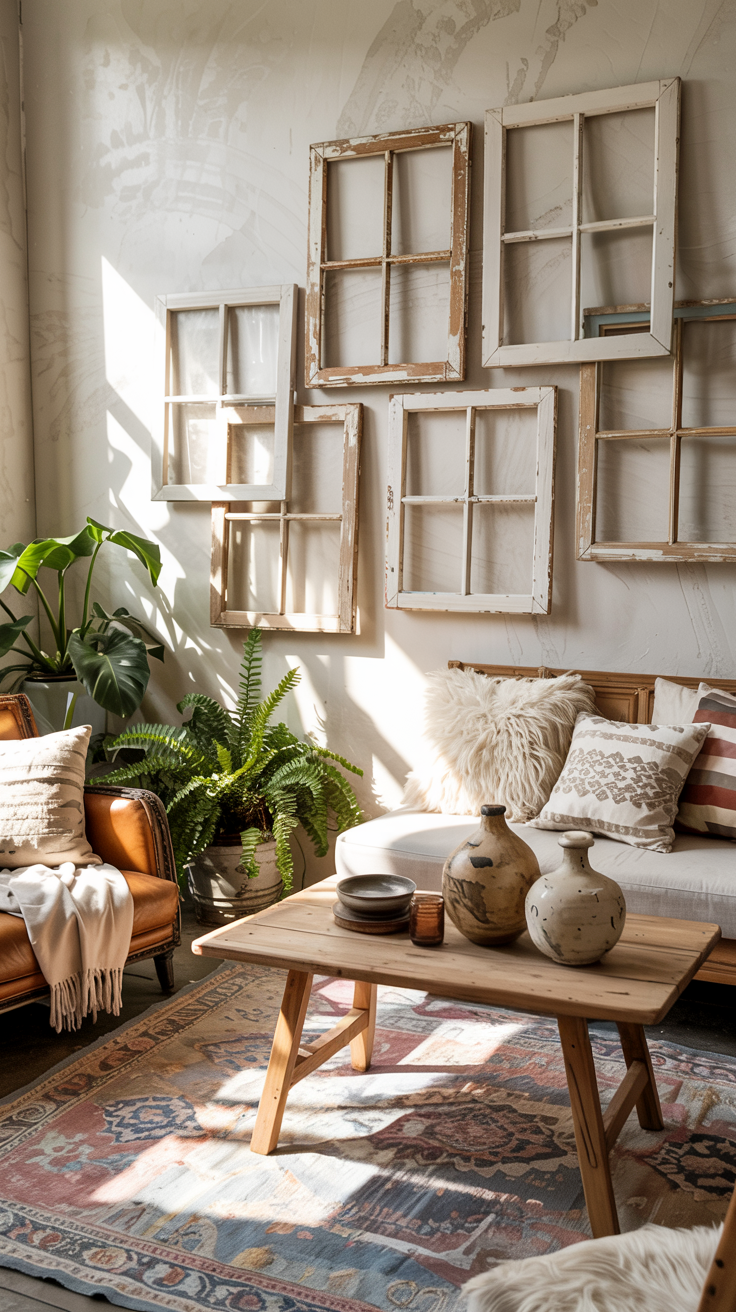
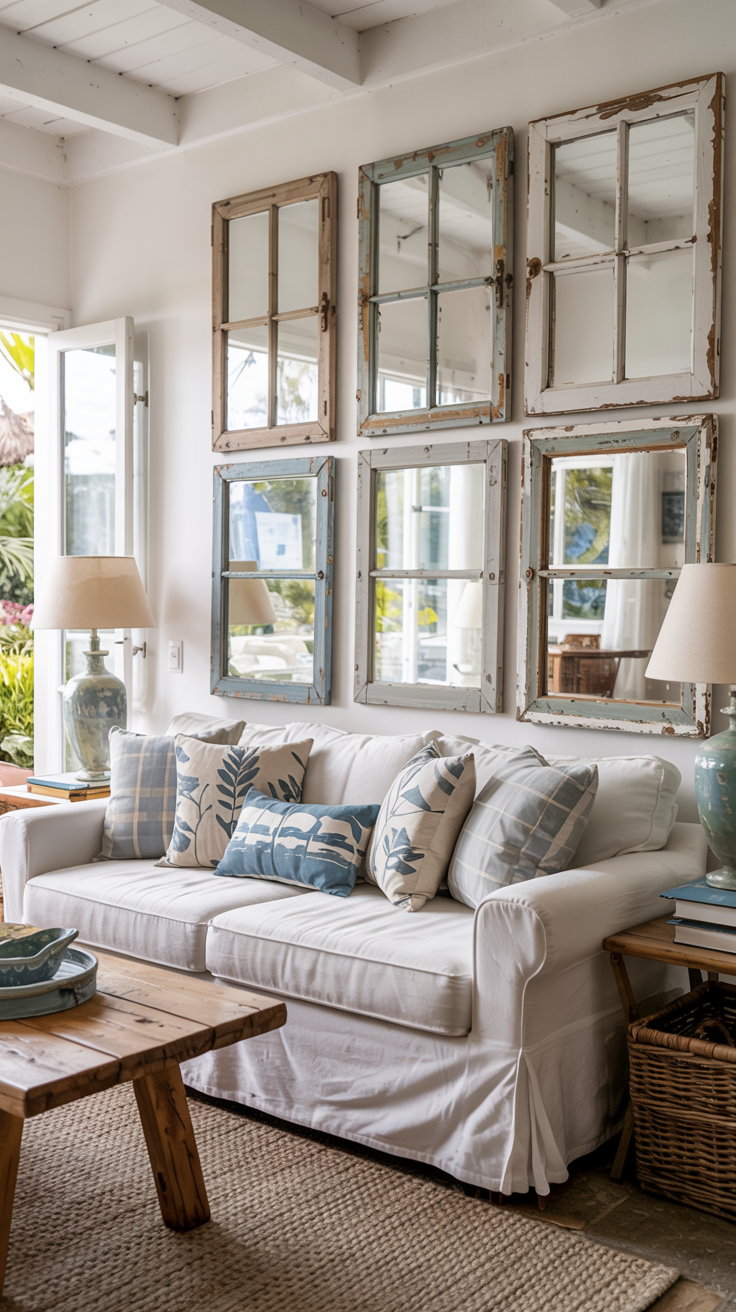
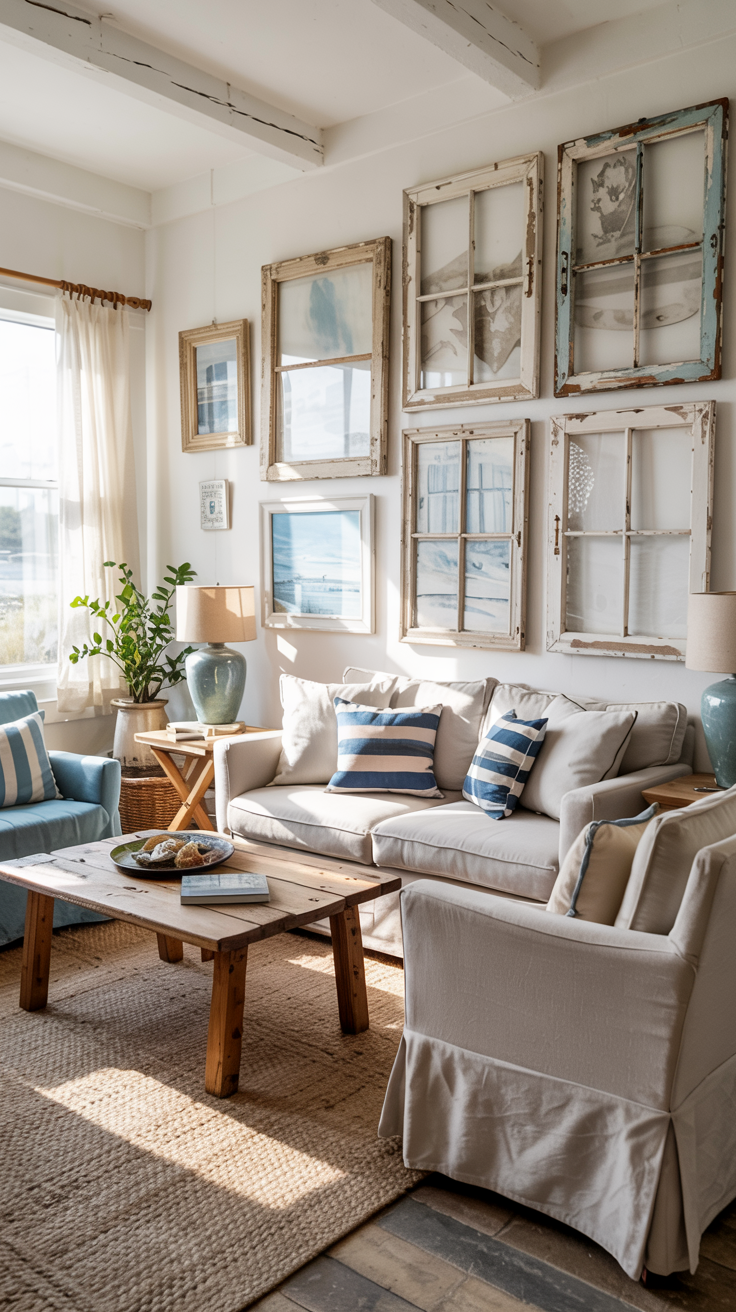
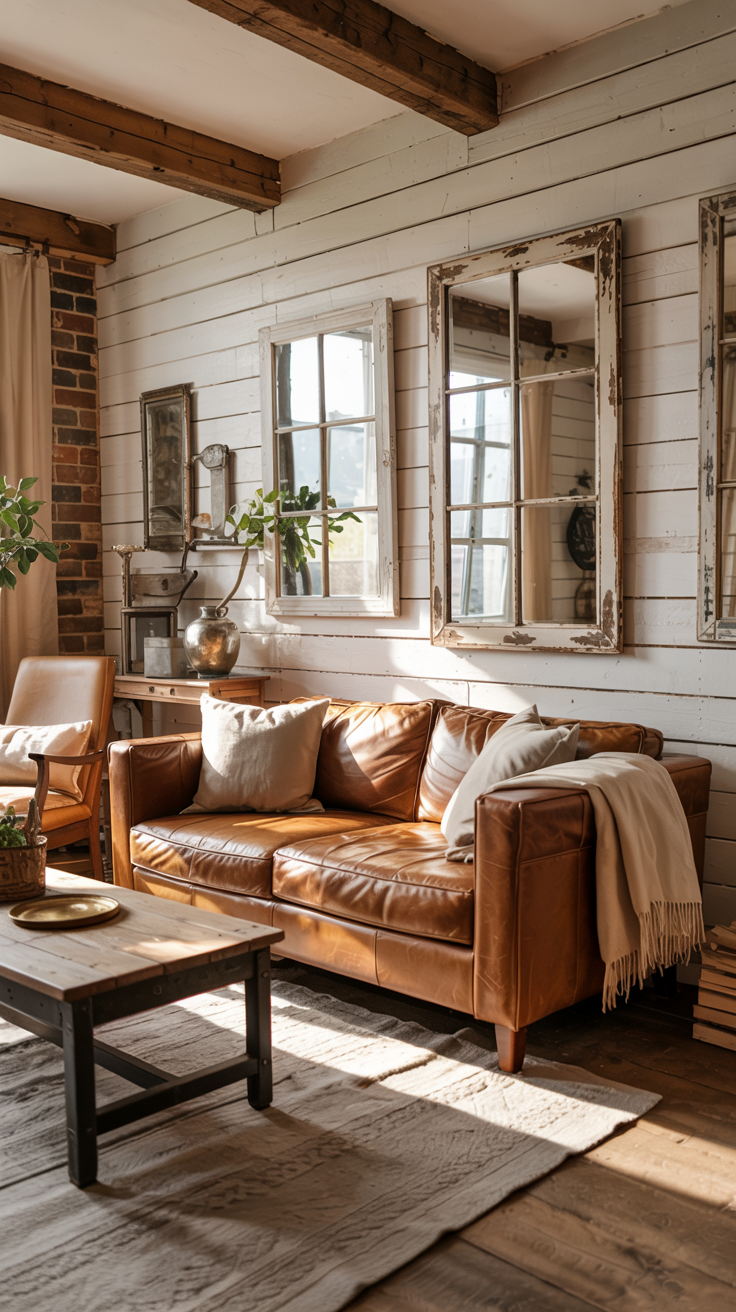
1. Vintage Window Frame Gallery Wall (Easy DIY Tutorial)
Weathered window frames are my secret weapon for instant vintage beach cottage character.
These architectural salvage pieces do triple duty. They add texture to blank walls, create visual interest without feeling too designed, and bring authentic patina you can't fake with new decor.
How to Create This Look
Source Your Frames
Check architectural salvage yards first ($15-$50 each)
Browse flea markets and estate sales in coastal areas
Search Facebook Marketplace and Craigslist for "vintage windows"
Try antique stores for curated options ($75-$150)
Start with 3-5 frames in varying sizes
Prep Without Ruining the Patina
Wipe frames with a damp cloth
Remove loose paint or rust, but keep the worn areas
Clean old glass gently (those wavy imperfections are valuable)
Tighten loose corners with wood glue
Don't over-restore them
Plan Your Layout
Arrange frames on the floor first
Take a photo of your favorite layout
Mix horizontal and vertical orientations
Keep 3-4 inches between frames
Avoid perfect symmetry for an organic look
Hang Properly
Use heavy-duty hanging hardware (these are heavier than they look)
Find wall studs for larger frames
Start with your largest piece, then build around it
Keep everything level but not too matchy
DIY: Age New Frames
Can't find vintage frames? Here's how I create authentic weathered finishes.
What You Need:
Wood frames
Milk paint (white and pale blue)
Sandpaper (120-150 grit)
Steel wool + white vinegar
Quick Process:
Paint frame pale blue, let dry
Layer white paint over blue (uneven coverage is good)
Sand edges and corners to reveal blue underneath
Spray with vinegar/steel wool solution for age spots
Let cure 48 hours
Focus on areas that would naturally wear. Real aging is random and imperfect.
Buy It Instead
Etsy: Authentic vintage frames ($40-$120 + shipping)
Facebook Marketplace: Reproduction aged windows ($150-$300)
Amazon: Heavy-duty hanging kit ($15-$25)
Always ask sellers for exact measurements and condition photos.
Styling Tips
Start with one statement frame. Live with it a few weeks before committing to a full gallery.
Mix in other elements. Add smaller vintage frames, coastal artwork, or mirrors for variety.
What to put behind the glass:
Black and white family beach photos
Vintage coastal maps
Pressed seaweed or beach grass
Old postcards
Nothing (just weathered frame and glass)
Best wall colors: White shiplap, soft blues, or warm neutrals let the frames shine.
Common Mistakes
Hanging too high (center should be 57-60" from floor)
Using frames that are too similar in size
Over-cleaning and stripping the patina
Cheap hanging hardware that fails
Making it too perfect and symmetrical
Budget Breakdown
Thrifty: $50-$150 (salvage yard finds + DIY)
Mid-Range: $200-$400 (mix of vintage and reproduction)
Investment: $500-$1000+ (all authentic salvage, 7-10 frames)
Build your collection over time. I started with two yard sale frames and added pieces over three years.
2. How to Display Beach Finds Under Glass Cloches
Vintage glass cloches turn your beach treasures into sophisticated displays. I use this trick to elevate simple shells and sea glass into focal points that look museum-worthy without feeling stuffy.
The key is creating height variation and grouping items intentionally. This transforms random beach finds into curated collections that add character to any surface.
How to Create These Displays
Gather Your Containers
Source vintage bell jars and glass domes from antique stores ($15-$40 each)
Look for old apothecary jars with lids
Check thrift stores for glass cake stands with covers
Find wooden printer's trays or divided boxes ($20-$60)
Mix different heights and sizes
Prep Your Beach Treasures
Clean shells and sea glass thoroughly
Sort by color, size, or type
Remove any lingering sand or debris
Group similar items together
Save your most unique pieces for solo displays
Create Varying Heights
Stack vintage books as risers
Use small wooden boxes or crates
Layer items at different levels
Place taller cloches in back, shorter in front
Leave breathing room between groupings
Style With Purpose
Put one statement piece under a large cloche
Group smaller items by color in trays
Add subtle lighting with battery-operated tea lights
Keep negative space (don't overcrowd)
Rotate displays seasonally
DIY: Age Glass for Vintage Look
New glass too shiny? I'll show you how to create that cloudy, time-worn effect.
What You Need:
Clean glass containers
White vinegar
Sea salt
Spray bottle
Process:
Mix equal parts water and white vinegar
Add 1 tablespoon sea salt per cup of solution
Spray inside and outside of glass
Let air dry naturally (don't wipe)
Repeat 2-3 times for more effect
The salt creates a subtle cloudy patina that looks authentically aged.
Buy It Instead
Etsy: Vintage glass cloches ($25-$80)
Amazon: Antique-style display boxes ($20-$50)
HomeGoods/TJ Maxx: Affordable glass domes ($15-$35)
Pottery Barn: Battery tea lights ($12-$20)
Styling Tips
Less is more. One beautiful shell under glass has more impact than a cluttered collection.
Group by color. All white shells in one area, blues and greens in another creates visual flow.
Mix textures. Combine smooth sea glass with rough coral, delicate sand dollars with chunky starfish.
Best locations:
Coffee table centerpieces
Bedroom dresser tops
Bathroom vanity corners
Bookshelf styling
Console table vignettes
Add context with:
Vintage books about marine life
Old rope or fishing net pieces
Driftwood as a base
Antique magnifying glasses
Common Mistakes
Overcrowding displays (ruins the museum effect)
Using all same-sized cloches (boring)
Dirty or sandy shells (looks unfinished)
No height variation (flat and uninteresting)
Forgetting to dust (glass shows everything)
Budget Breakdown
Thrifty: $30-$75 (thrift store glass + found shells)
Mid-Range: $100-$200 (mix vintage and new pieces)
Investment: $300-$500+ (authentic antique cloches and boxes)
Start with what you have. Your beach finds are free, and you probably own some glass containers already.
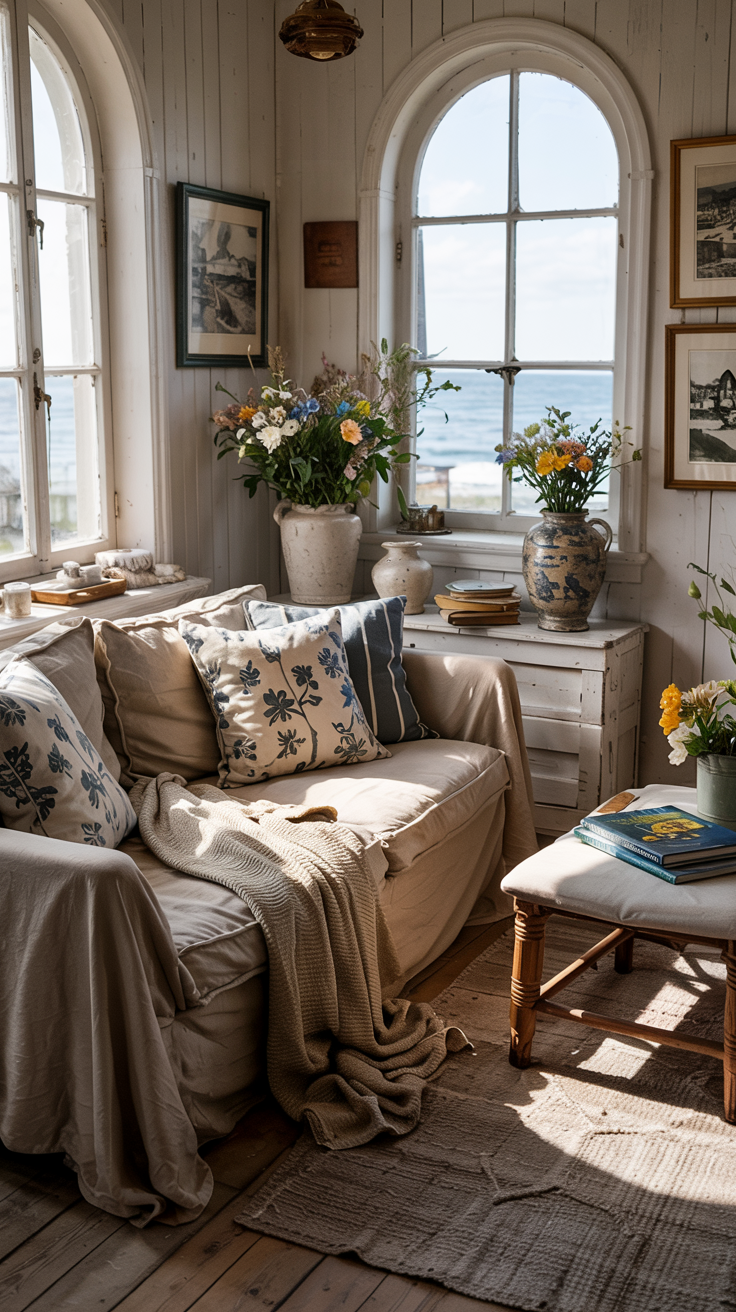
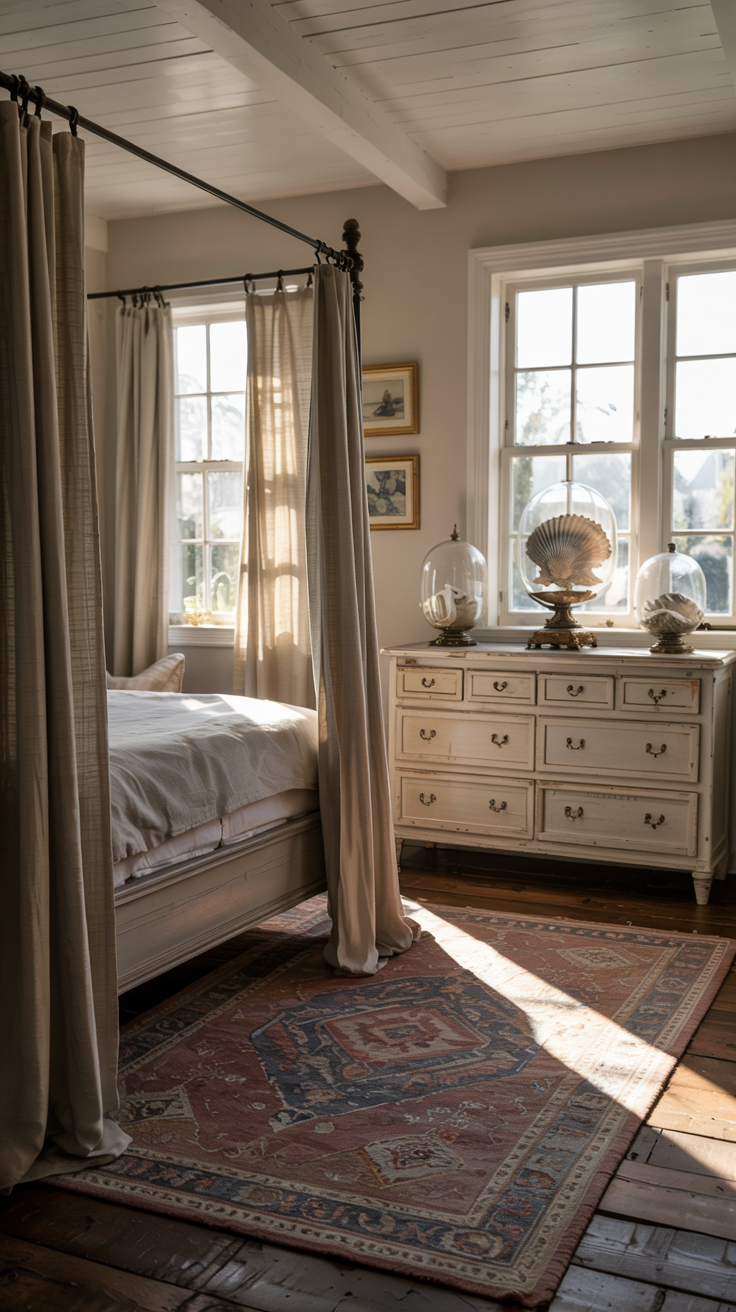
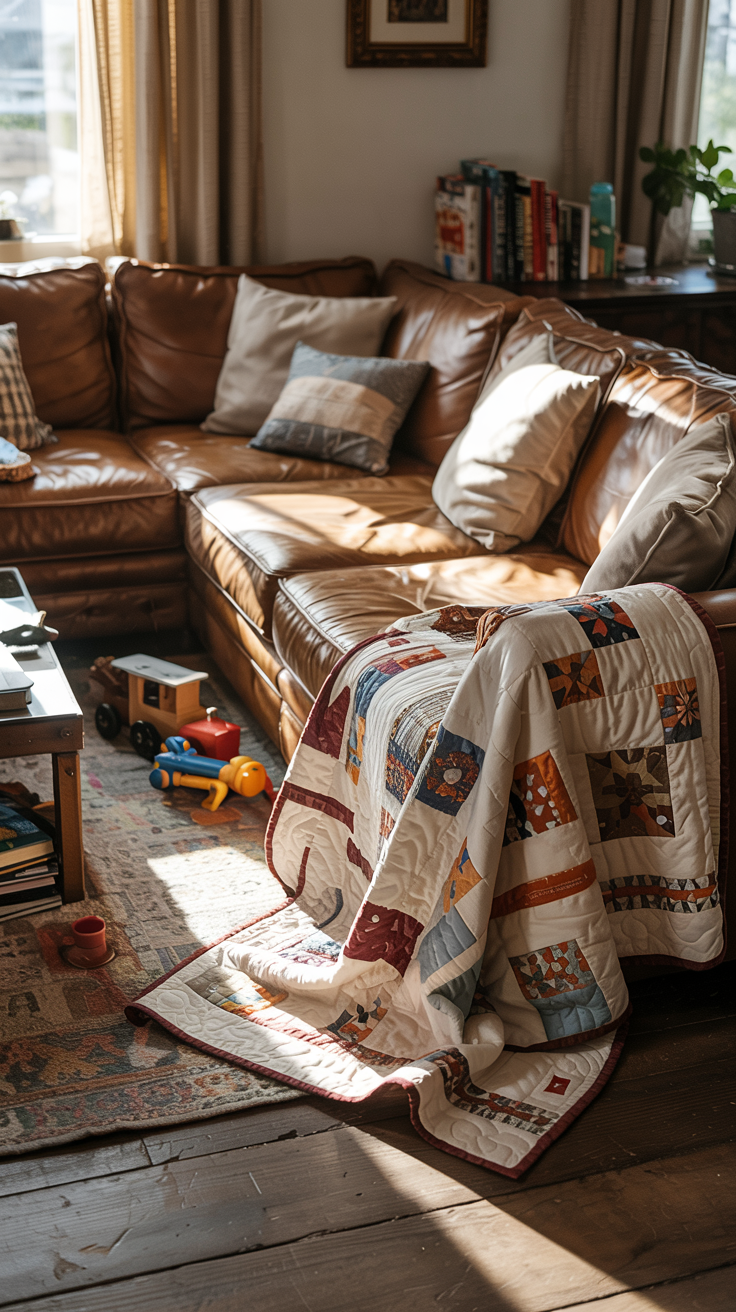
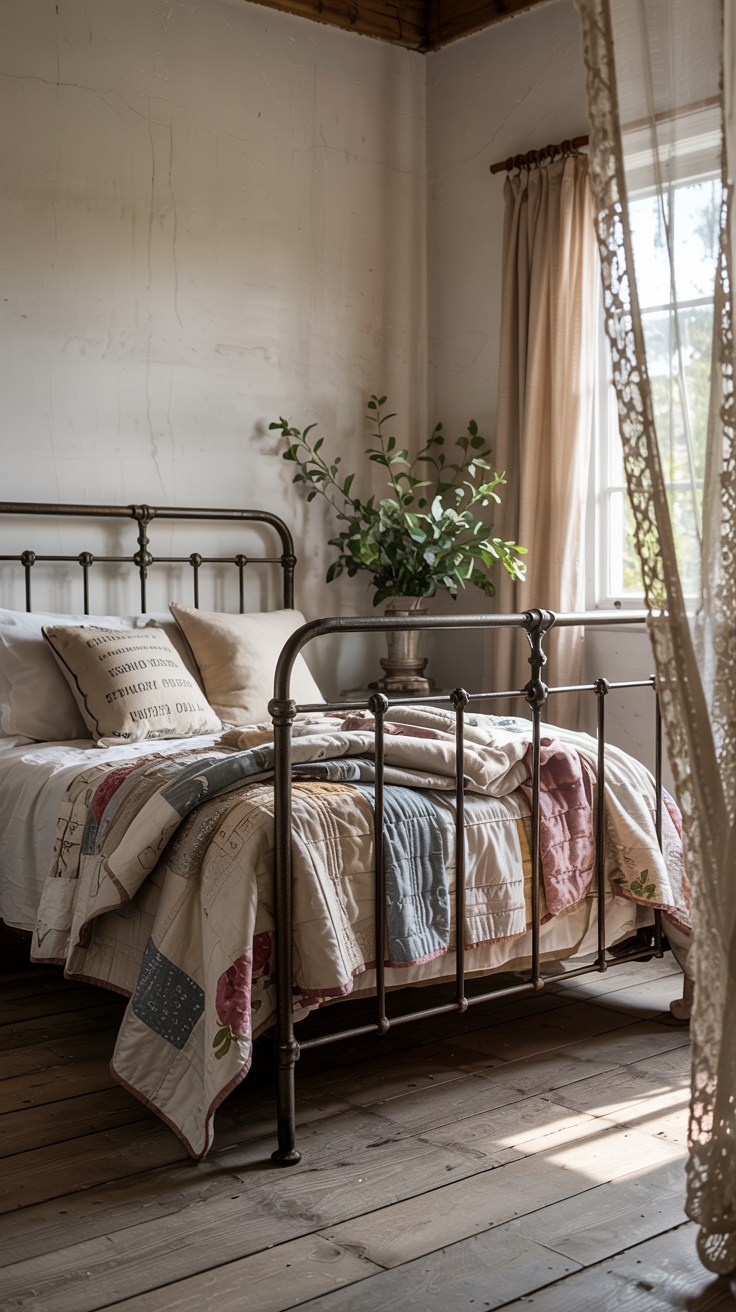
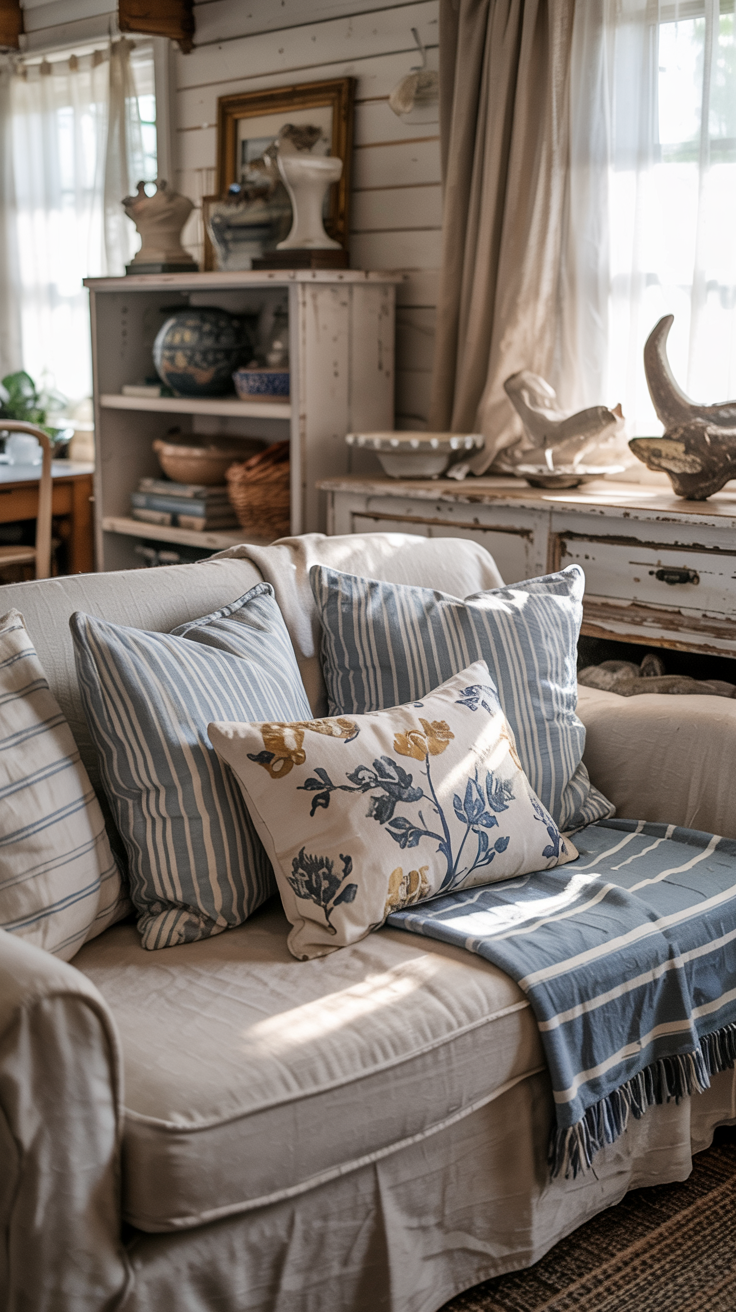
3. How to Layer Vintage Textiles in a Beach Cottage
Layering vintage textiles adds depth and warmth to your beach cottage. I use this technique to create that inviting, lived-in feel that makes guests want to curl up and stay awhile.
The trick is mixing textures while keeping your color palette cohesive. Think faded quilts, grain sack pillows, and worn linens all working together.
How to Layer Textiles
Source Vintage Fabrics
Find vintage quilts in coastal colors at estate sales ($30-$100)
Look for old grain sacks at flea markets ($15-$40 each)
Check Etsy for ticking stripe fabrics ($20-$50 per yard)
Hunt for vintage Turkish towels or linen ($25-$75)
Browse antique stores for feedsack fabric
Choose Your Color Palette
Stick to 2-3 main colors (whites, blues, soft greens)
Add neutral tones (beige, cream, gray)
Embrace sun-faded and worn colors
Avoid anything too bright or new-looking
Let imperfections show
Layer Strategically
Start with your sofa or bed as the base
Add a vintage quilt as the main layer
Layer 3-5 pillows in different textures
Drape a throw blanket casually over one arm
Place a basket of rolled vintage towels nearby
Mix Textures
Combine smooth with rough (linen with burlap)
Pair worn quilts with crisp ticking stripe
Mix loose weaves with tight weaves
Add chunky knits for contrast
Include some waffle weave or gauze
DIY: Make Pillow Covers from Vintage Fabrics
Turn old textiles into custom pillows without sewing skills.
What You Need:
Vintage grain sacks or quilt pieces
Pillow inserts (18x18 or 20x20)
Fabric scissors
Iron
Envelope Style (No Sewing):
Cut fabric 2 inches larger than pillow on all sides
Fold edges over 1 inch and iron flat
Lay fabric face down, place pillow in center
Fold fabric over pillow like wrapping a gift
Tuck flaps in at back to secure
For worn quilts, cut damaged sections into throw pillow covers. This gives new life to pieces too fragile for full display.
Buy It Instead
Etsy: Vintage coastal quilts ($80-$200)
eBay: Antique grain sack pillows ($35-$80)
One Kings Lane: Vintage Turkish towels ($40-$120)
Amazon: Ticking stripe pillow covers ($15-$30)
Styling Tips
Embrace imperfections. Faded colors, small stains, and worn spots add authenticity.
Mix old and new. Combine vintage pieces with fresh white linens to keep it practical.
Best places to layer:
Sofas and armchairs
Beds (multiple quilts work beautifully)
Reading nooks and window seats
Dining chairs (vintage cushions)
Outdoor furniture (washable vintage finds)
Create a collected look:
Don't match everything perfectly
Vary pattern scales (large stripes with small checks)
Add one unexpected texture (velvet, leather)
Keep it touchable and functional
Common Mistakes
Buying textiles that are too fragile to use
Matching fabrics too perfectly (looks staged)
Using only one type of fabric (boring)
Ignoring care instructions (some need gentle washing)
Over-layering (creates clutter, not coziness)
Budget Breakdown
Thrifty: $50-$150 (thrift store finds + DIY pillows)
Mid-Range: $200-$400 (mix of vintage and reproduction)
Investment: $500-$1000+ (authentic antique quilts and rare textiles)
Start with one vintage quilt and a few grain sack pillows. Add more pieces as you find them.
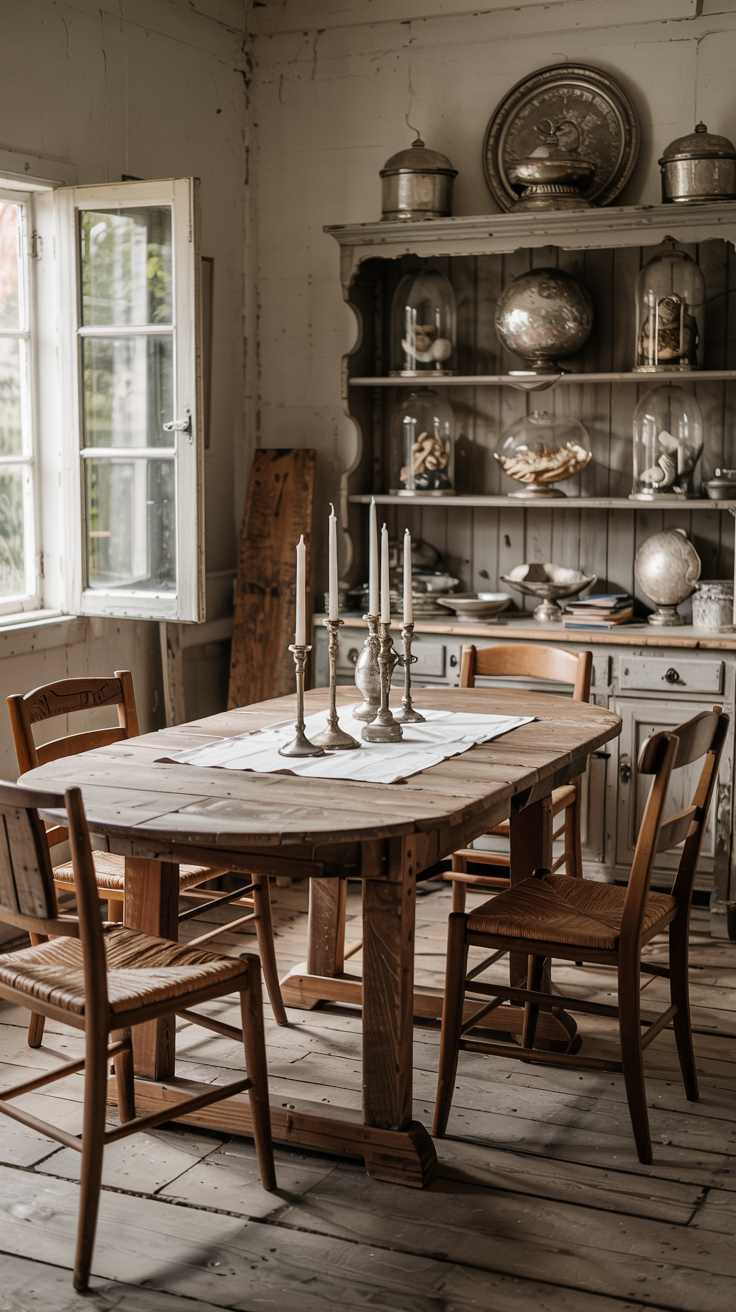
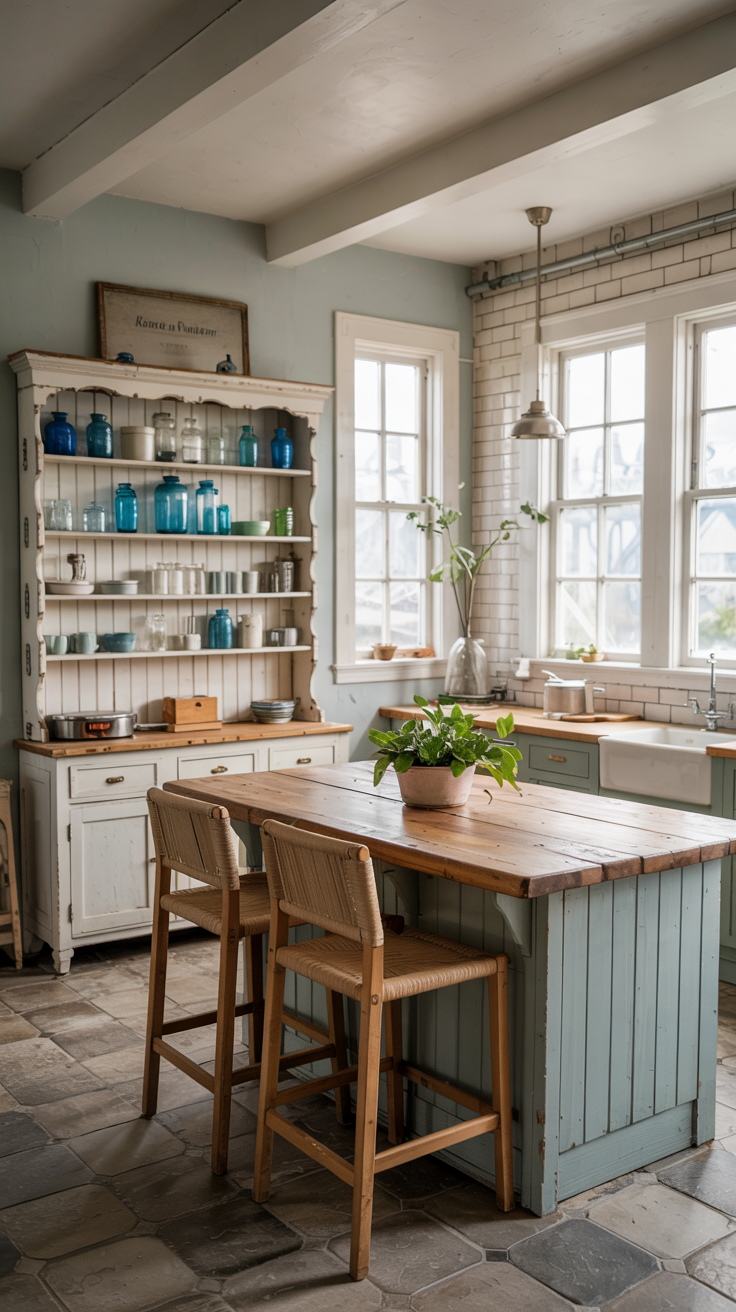
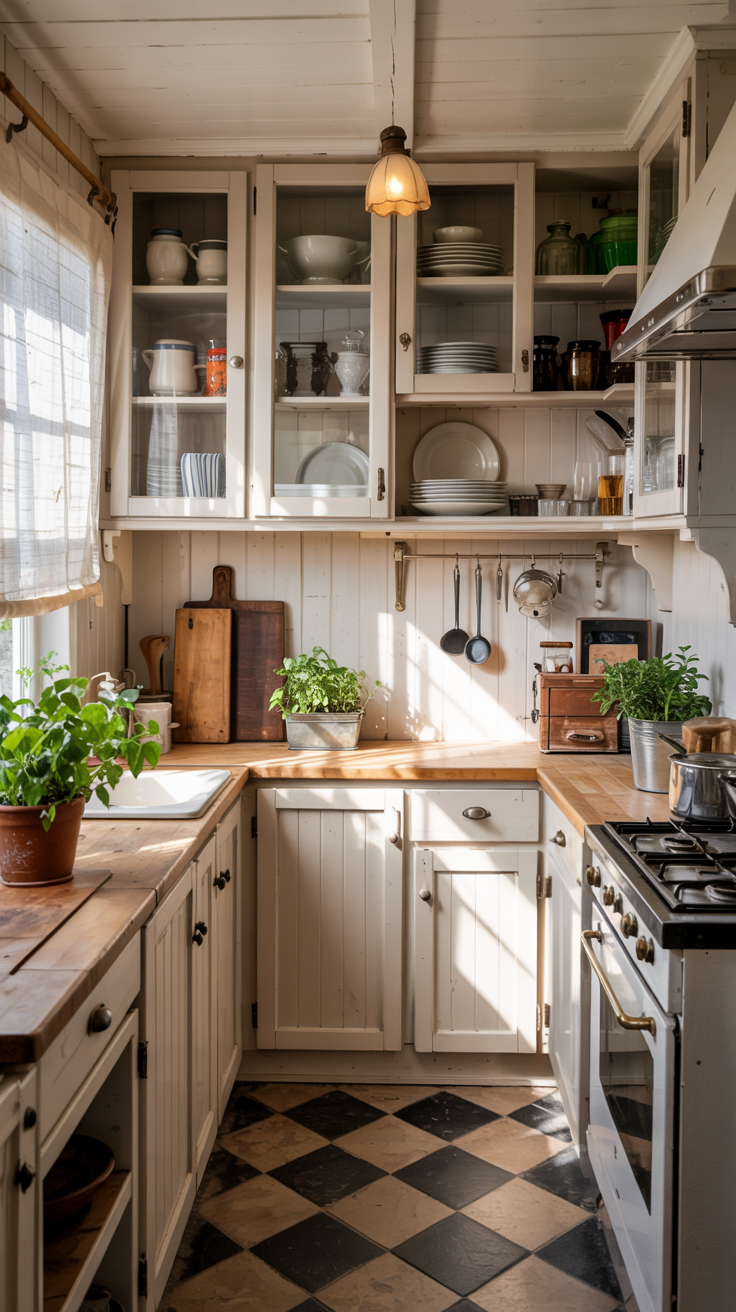
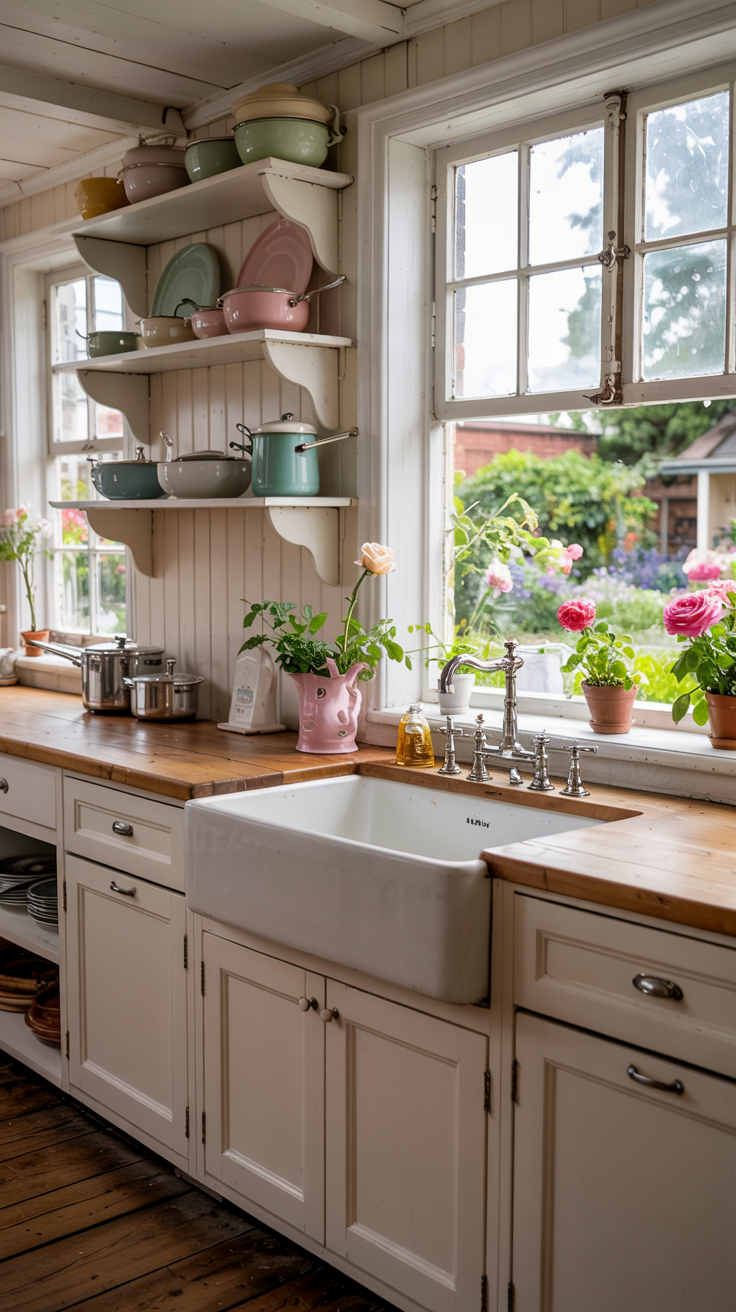
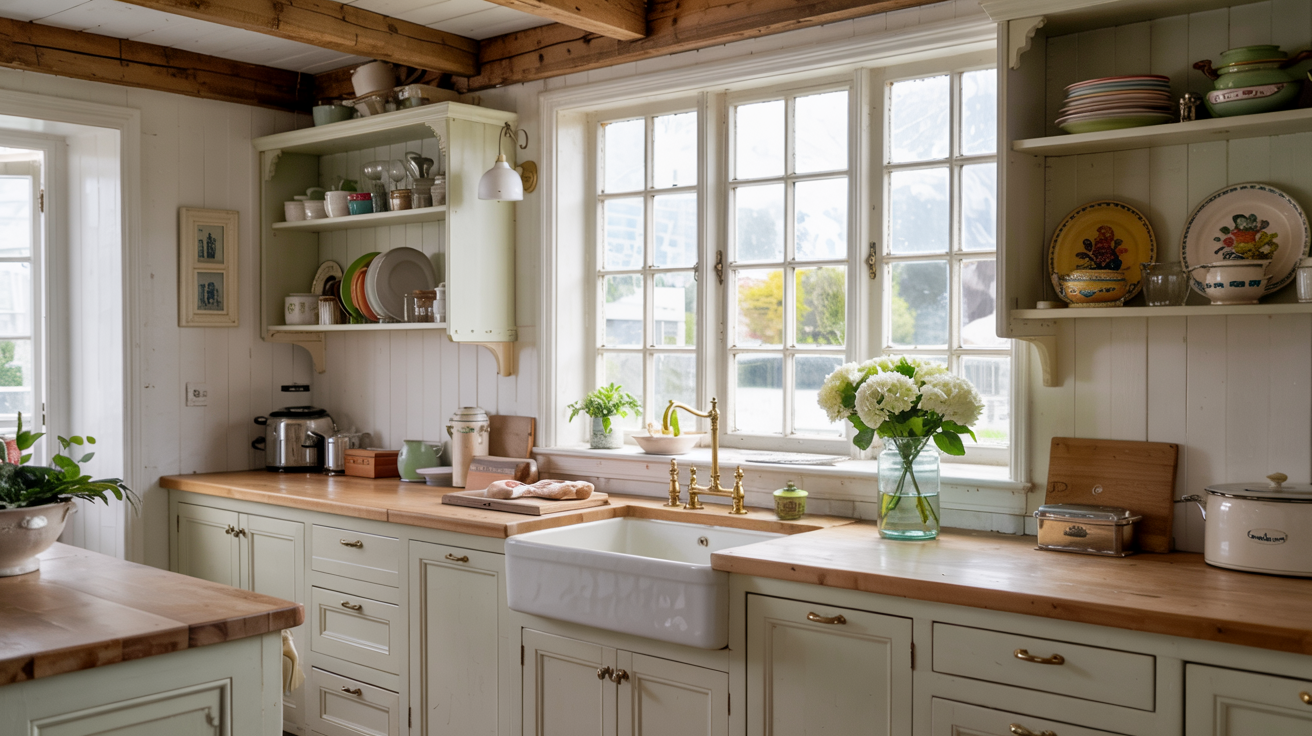
4. How to Add Vintage Character to a Beach Cottage Kitchen
Vintage kitchen elements create warmth in the heart of your beach cottage. I use weathered wood, old enamelware, and antique tools to make kitchens feel like they've been cooking up memories for generations.
The best part is that most vintage kitchen pieces are functional, not just decorative.

How to Style with Vintage Kitchen Pieces
Source Vintage Kitchen Items
Look for enamelware pitchers and bowls at flea markets ($10-$40)
Find old wooden cutting boards at estate sales ($15-$50)
Collect vintage mason jars in blue tones ($5-$15 each)
Hunt for antique kitchen utensils and tools ($8-$25)
Check antique stores for breadboards ($20-$60)
Display on Open Shelving
Install floating shelves or remove cabinet doors
Group items by color (whites, blues, neutrals)
Mix functional pieces with decorative ones
Vary heights with risers or small stands
Leave some breathing room between items
Create Functional Displays
Fill enamelware pitchers with wooden spoons or flowers
Stack vintage cutting boards against the backsplash
Line up mason jars filled with dry goods
Hang antique measuring cups on brass hooks
Display breadboards as functional art
Add Weathered Wood
Use old cutting boards as trivets
Display vintage breadboards vertically
Add a weathered wooden shelf or two
Include an old wooden crate for storage
Lean boards against the wall in groups
DIY: Age New Cutting Boards
Turn new wood into authentic-looking vintage pieces.
What You Need:
Unfinished wooden cutting board
Steel wool (fine grade)
White vinegar
Small container
Food-safe mineral oil
Process:
Soak steel wool in white vinegar for 24 hours
Brush solution onto clean wood board
Let sit for 2-4 hours (wood will gray naturally)
Rinse and dry completely
Sand lightly if needed
Treat with food-safe mineral oil
The vinegar and steel wool react to create an aged gray patina. For more aging, repeat the process.
Buy It Instead
Etsy: Vintage enamelware collections ($30-$100)
eBay: Antique blue mason jars ($8-$25 each)
Antique stores: Old wooden boards ($20-$75)
Amazon: Brass hooks and vintage-style hardware ($15-$40)
Styling Tips
Mix functional with decorative. Keep everyday items within reach, display special vintage pieces up high.
Best vintage kitchen items to collect:
White and blue enamelware
Wooden cutting and bread boards
Blue mason jars (various sizes)
Antique kitchen scales
Vintage wire baskets
Old rolling pins
Copper measuring cups
Color palette:
Stick to whites, soft blues, and natural wood tones
Add brass or copper for warmth
Avoid bright colors that feel too modern
Embrace chippy paint and patina
Display ideas:
Group 3-5 items together for impact
Layer boards and trays vertically
Fill pitchers with fresh or dried flowers
Use jars for functional storage (flour, sugar, utensils)
Hang items when possible to save counter space
Common Mistakes
Overcrowding shelves (looks cluttered, not charming)
Using items that aren't food-safe for food prep
Mixing too many different styles (pick a cohesive look)
Forgetting to clean vintage items properly before use
Displaying everything (rotate items seasonally)
Budget Breakdown
Thrifty: $50-$100 (flea market finds + DIY aging)
Mid-Range: $150-$300 (mix of vintage and new pieces)
Investment: $400-$700+ (authentic antiques and quality reproductions)
Start with a few enamelware pieces and wooden boards. Build your collection slowly as you find items you love.
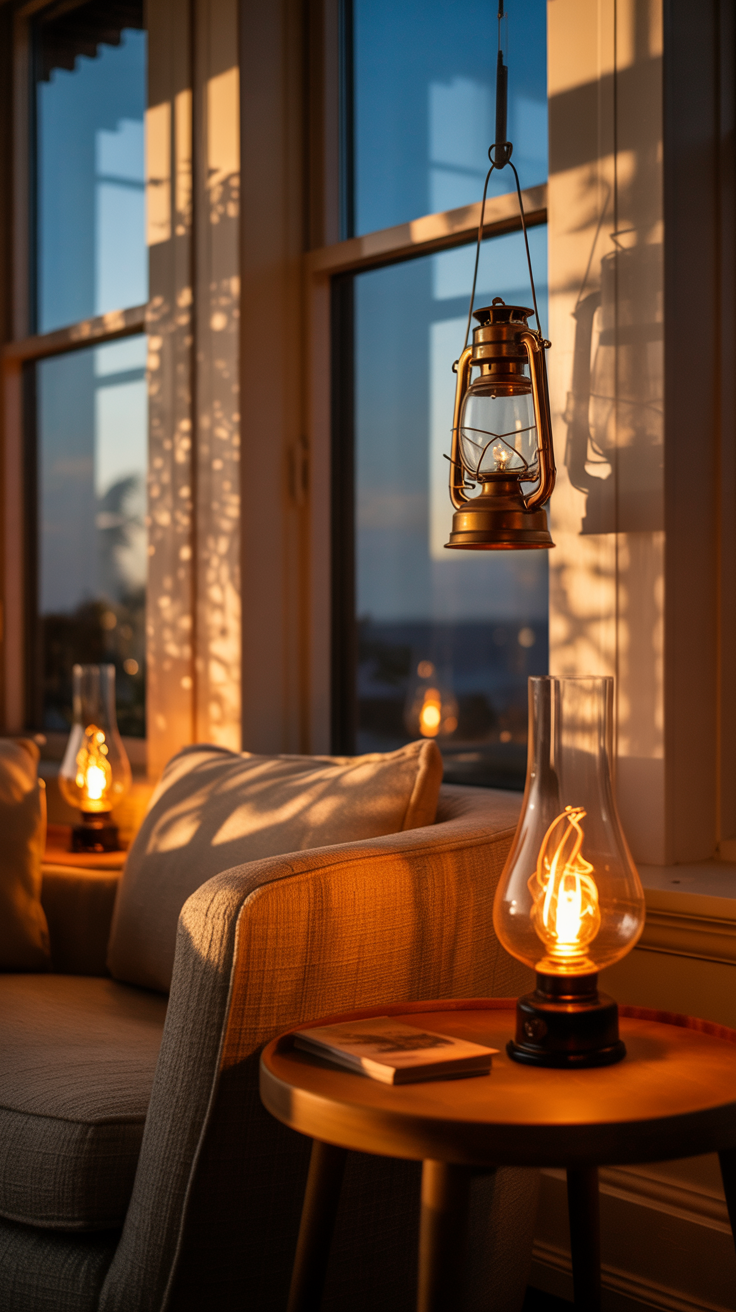
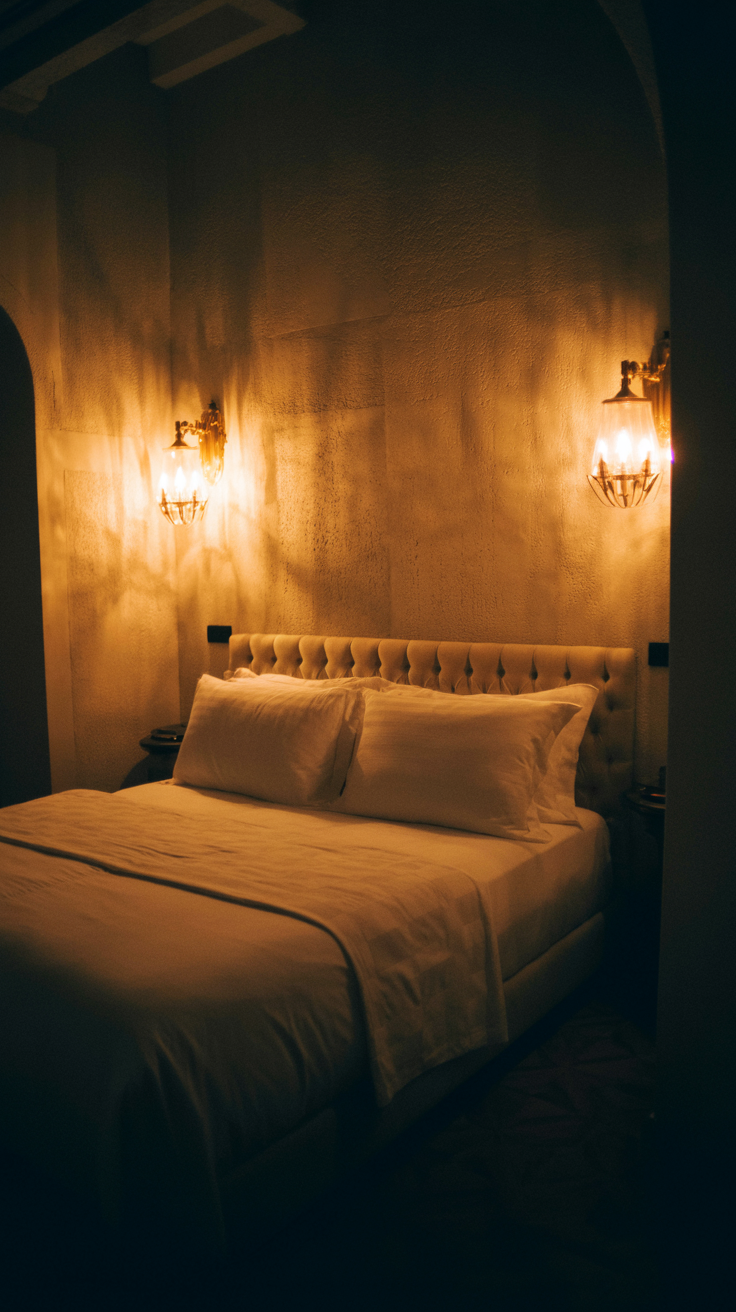
5. How to Use Vintage Lighting in a Beach Cottage
Vintage lighting fixtures add instant character while creating the perfect cozy ambiance. I use a mix of nautical lights, hurricane lamps, and repurposed glass to layer lighting throughout beach cottages.
The key is mixing different light sources at varying heights. This creates depth and warmth that overhead lighting alone can't achieve.
How to Incorporate Vintage Lighting
Source Vintage Light Fixtures
Find authentic ship's lights at marine salvage yards ($75-$200)
Look for hurricane lamps at antique stores ($25-$80 each)
Search for old glass fishing floats online ($30-$100)
Check flea markets for vintage mason jars ($5-$15)
Browse architectural salvage for period fixtures ($50-$300)
Layer Different Light Types
Use one statement nautical fixture as a focal point
Add 2-3 hurricane lamps for ambient lighting
Include table or floor lamps with vintage bases
Install mason jar sconces in bathrooms
Place battery candles in old lanterns
Create the Right Ambiance
Install dimmer switches on all fixtures
Use warm bulbs (2700K) for cozy glow
Mix electric and candle light
Layer task lighting with ambient lighting
Avoid harsh overhead-only lighting
Best Placement
Ship's lights in entryways or reading corners
Hurricane lamps on mantels and side tables
Mason jar sconces flanking mirrors
Glass float lamps in living rooms
Vintage lanterns on porches and outdoor spaces
DIY: Turn Mason Jars into Wall Sconces
Create affordable vintage-style lighting with basic supplies.
What You Need:
Vintage mason jars
Wall sconce hardware kit (available online)
Warm LED bulbs
Screwdriver
Drill (if mounting to studs)
Process:
Purchase mason jar sconce conversion kits ($15-$25 each)
Follow kit instructions to attach jar to mounting plate
Install according to manufacturer directions
Use warm-toned LED bulbs for authentic look
Consider mounting in pairs for balance
For glass float lamps, purchase lamp conversion kits and follow similar process.
Buy It Instead
Etsy: Restored ship's lights ($150-$400)
West Elm: Vintage-style hurricane lamps ($40-$90)
Amazon: Mason jar sconce kits ($10-$40)
Wayfair: Glass float lamps ($80-$200)
Styling Tips
Mix fixture types at different heights. Combine floor lamps, table lamps, wall sconces, and hanging fixtures for layered lighting.
Best vintage lighting for beach cottages:
Brass or copper ship's lights
Clear glass hurricane lamps
Blue or green glass floats as pendants
Rope-wrapped fixtures
Weathered metal lanterns
Enamel pendant lights
Choose warm bulbs:
Aim for 2700K color temperature
Use Edison-style bulbs for vintage look
Try dimmable LEDs for energy efficiency
Avoid cool white or daylight bulbs
Create lighting zones:
Task lighting for reading and cooking
Ambient lighting for overall glow
Accent lighting to highlight collections
Mood lighting for evenings
Common Mistakes
Using all overhead lighting (too harsh)
Choosing bulbs that are too bright or cool-toned
Forgetting to install dimmers (essential for ambiance)
Mixing too many different metal finishes
Not having enough light sources (one per seating area minimum)
Budget Breakdown
Thrifty: $75-$200 (DIY mason jars + flea market finds)
Mid-Range: $300-$600 (mix of vintage and reproduction pieces)
Investment: $800-$1500+ (authentic restored nautical fixtures)
Start with hurricane lamps and one statement piece. Add mason jar sconces as budget allows.
Start Building Your Vintage Beach Cottage Today
You don't need to transform your entire beach cottage overnight. I've seen the most beautiful spaces evolve piece by piece over months or even years.
Pick one idea from this guide and start there. Maybe you'll hunt for your first weathered window frame this weekend. Or you'll display those shells you collected last summer under a glass cloche.
Small steps create big impact.
Your Action Plan
This Week:
Choose which vintage element speaks to you most
Set a budget for your first purchase or DIY project
Check local flea markets, estate sales, or Facebook Marketplace
Clear a space where you'll display your first vintage piece
This Month:
Source 2-3 vintage items for your chosen project
Complete one DIY aging technique
Take before photos so you can see your progress
Start a collection list of items you're hunting for
This Year:
Build your vintage collection gradually
Mix in new pieces as you find them
Rotate seasonal displays to keep things fresh
Take photos and share your beach cottage transformation
Remember These Key Points
Imperfection is the goal. Chips, fading, and wear make pieces authentic. Don't over-restore or try to make everything match perfectly.
Start small and build. One weathered window frame beats a wall full of cheap reproductions. Quality over quantity always wins.
Make it functional. The best vintage beach cottages use their collections. Cook with that old cutting board. Display flowers in enamelware pitchers. Light those hurricane lamps.
Trust your instincts. If you love a piece, it belongs in your home. Don't overthink it or wait for permission to create the space you want.
Next Steps
Browse your local flea markets this weekend. Join Facebook groups for vintage coastal decor. Follow estate sale listings in your area. The perfect pieces are out there waiting for you to find them.
Your beach cottage should tell your story and welcome you home. Every vintage piece you add creates more character and warmth.
Ready for more coastal cottage inspiration? Check out my guide on creating a cozy beach cottage for additional styling ideas that complement these vintage touches.
Start with one piece. Build from there. Enjoy the hunt as much as the finished space.
20 Vintage Cottage Kitchen Ideas That'll Make You Ditch Everything and Move to the Beach
Frequently Asked Questions About Vintage Beach Cottage Decor (FAQs)
Where can I find authentic vintage beach cottage decor?
The best places to find authentic vintage pieces are architectural salvage yards, estate sales, and flea markets in coastal areas. I also recommend Facebook Marketplace, Craigslist, and local antique stores. For online shopping, Etsy has thousands of verified vintage sellers. Start locally to avoid high shipping costs on heavy items like window frames.
How much should I spend on vintage beach cottage decor?
You can start with as little as $50-$150 for a small project like displaying beach finds under glass or creating a few textile layers. A full room transformation typically costs $500-$1500 depending on whether you DIY or buy authentic antiques. I always recommend starting with one statement piece and building your collection over time rather than buying everything at once.
What's the difference between vintage and shabby chic beach decor?
Vintage beach cottage decor uses authentic aged pieces with real patina and history. Shabby chic often relies on distressed finishes applied to new furniture. Vintage pieces have genuine wear from decades of use, while shabby chic creates that look artificially. Both can work in beach cottages, but vintage pieces tend to feel more authentic and have better resale value.
How do I clean vintage items without ruining the patina?
Wipe vintage pieces with a slightly damp cloth and mild soap. Never use harsh chemicals or scrub aggressively. For wood, use a small amount of mineral oil after cleaning. For glass and enamelware, gentle dish soap works well. The key is preserving the natural wear and aging. Some dirt and discoloration is part of the charm, so don't over-clean.
Can I mix vintage decor with modern furniture?
Absolutely. Mixing vintage accessories with modern furniture creates a balanced, livable space. I recommend keeping larger furniture pieces simple and modern, then layering in vintage textiles, lighting, and decorative items. This approach is more practical and prevents your home from feeling like a museum.
Where should I start if I'm new to vintage beach cottage decorating?
Start with one of these three projects: weathered window frames for your walls, vintage textiles for your sofa, or antique lighting in one room. Choose whichever appeals to you most. Begin with 2-3 pieces, live with them for a few weeks, then add more. This gradual approach helps you develop your eye and avoid costly mistakes.
How do I know if a vintage piece is worth the price?
Look for solid construction, authentic wear patterns, and reasonable pricing for your area. Research similar items on Etsy and eBay to understand market value. Authentic vintage pieces should show consistent aging (not artificially distressed). For furniture and windows, check for structural integrity. Don't pay premium prices for items you can easily DIY or find elsewhere.
What colors work best for vintage beach cottage style?
Stick to a palette of soft whites, faded blues, sea greens, weathered grays, and natural wood tones. These colors reflect authentic coastal aging. Avoid bright, saturated colors or trendy shades that will date quickly. The best vintage beach cottages use colors that look sun-bleached and salt-worn.
How do I style vintage pieces without making my home look cluttered?
Use the rule of threes for groupings, leave plenty of negative space, and edit ruthlessly. Not every vintage piece you find needs to be displayed at once. Rotate items seasonally and store extras. Create intentional vignettes rather than cramming shelves full. Remember that breathing room makes each piece more impactful.
Are reproduction vintage items worth buying?
Quality reproductions can work well when mixed with authentic pieces, especially for functional items you'll use daily. They're often more affordable and readily available. However, authentic vintage pieces have better character and often better construction. I recommend a mix: invest in a few authentic statement pieces and fill in with quality reproductions.